Smarter Homes
Role
UI Design
Development
Research + Implementation
Duration
4 weeks
Responsibilities
Crafting Design Systems
UI Prototyping
Unity Prototype Development
Setup entities within HA for existing devices
Tools
Figma
Unity Engine
Home Assistant
Raspberry Pi
Project overview
The goal was to explore and create a functional prototype demonstrating real-world appliance control via virtual buttons in mixed reality. Motivated by the desire to move beyond conceptual designs often showcased in after-effects, I aimed to build a working model tailored to my home environment.
Scope
Problem
Current mixed reality applications lack intuitive and visually appealing interfaces for smart home integration and control. This project seeks to fill that void, offering a seamless control experience within an XR environment.
Approach
The project took a creative and exploratory approach to UI design in XR, prioritizing visual experimentation and the development of a prototype that merges aesthetics with functionality.
The focus was on crafting a visually rich and experimental dashboard that challenges traditional interface design within an XR environment.
Product goals
Visual Clarity: To redefine the way users interact with smart home devices by leveraging mixed reality (XR) technology, creating a more intuitive and immersive control experience.
Seamless Integration of Diverse Devices: To achieve a high level of compatibility and seamless integration across a wide range of smart home devices, enabling users to control lighting, fans, vacuums, projectors, and more through a unified XR interface.
Practical Application: To move beyond conceptual prototypes and deliver a functional XR prototype that reliably controls real-world smart home devices, demonstrating the practical application of mixed reality in everyday life.
Concept to interface
Planning
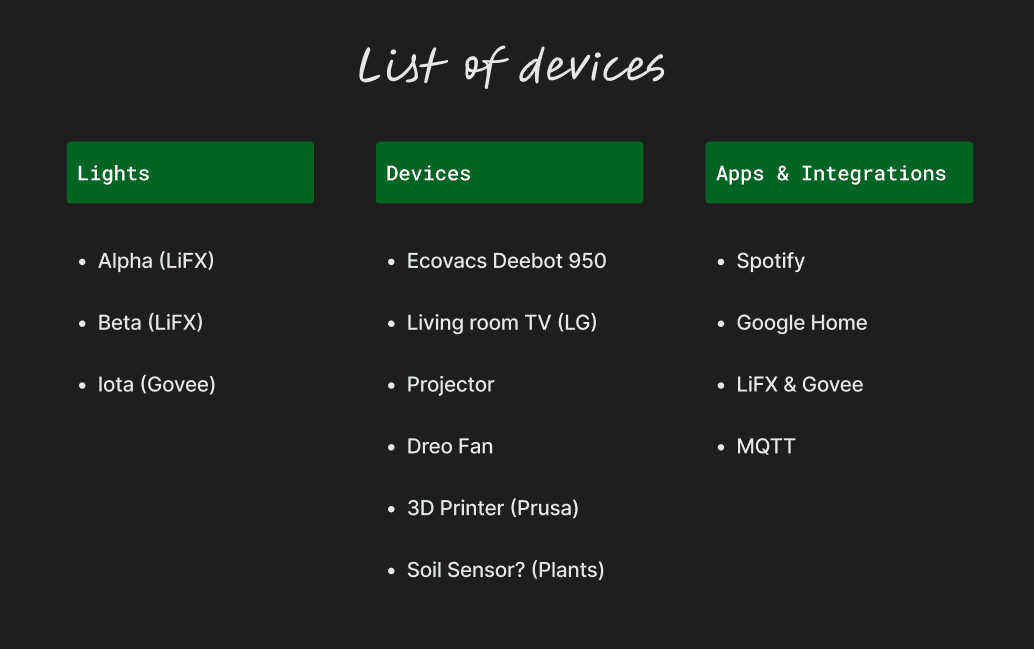
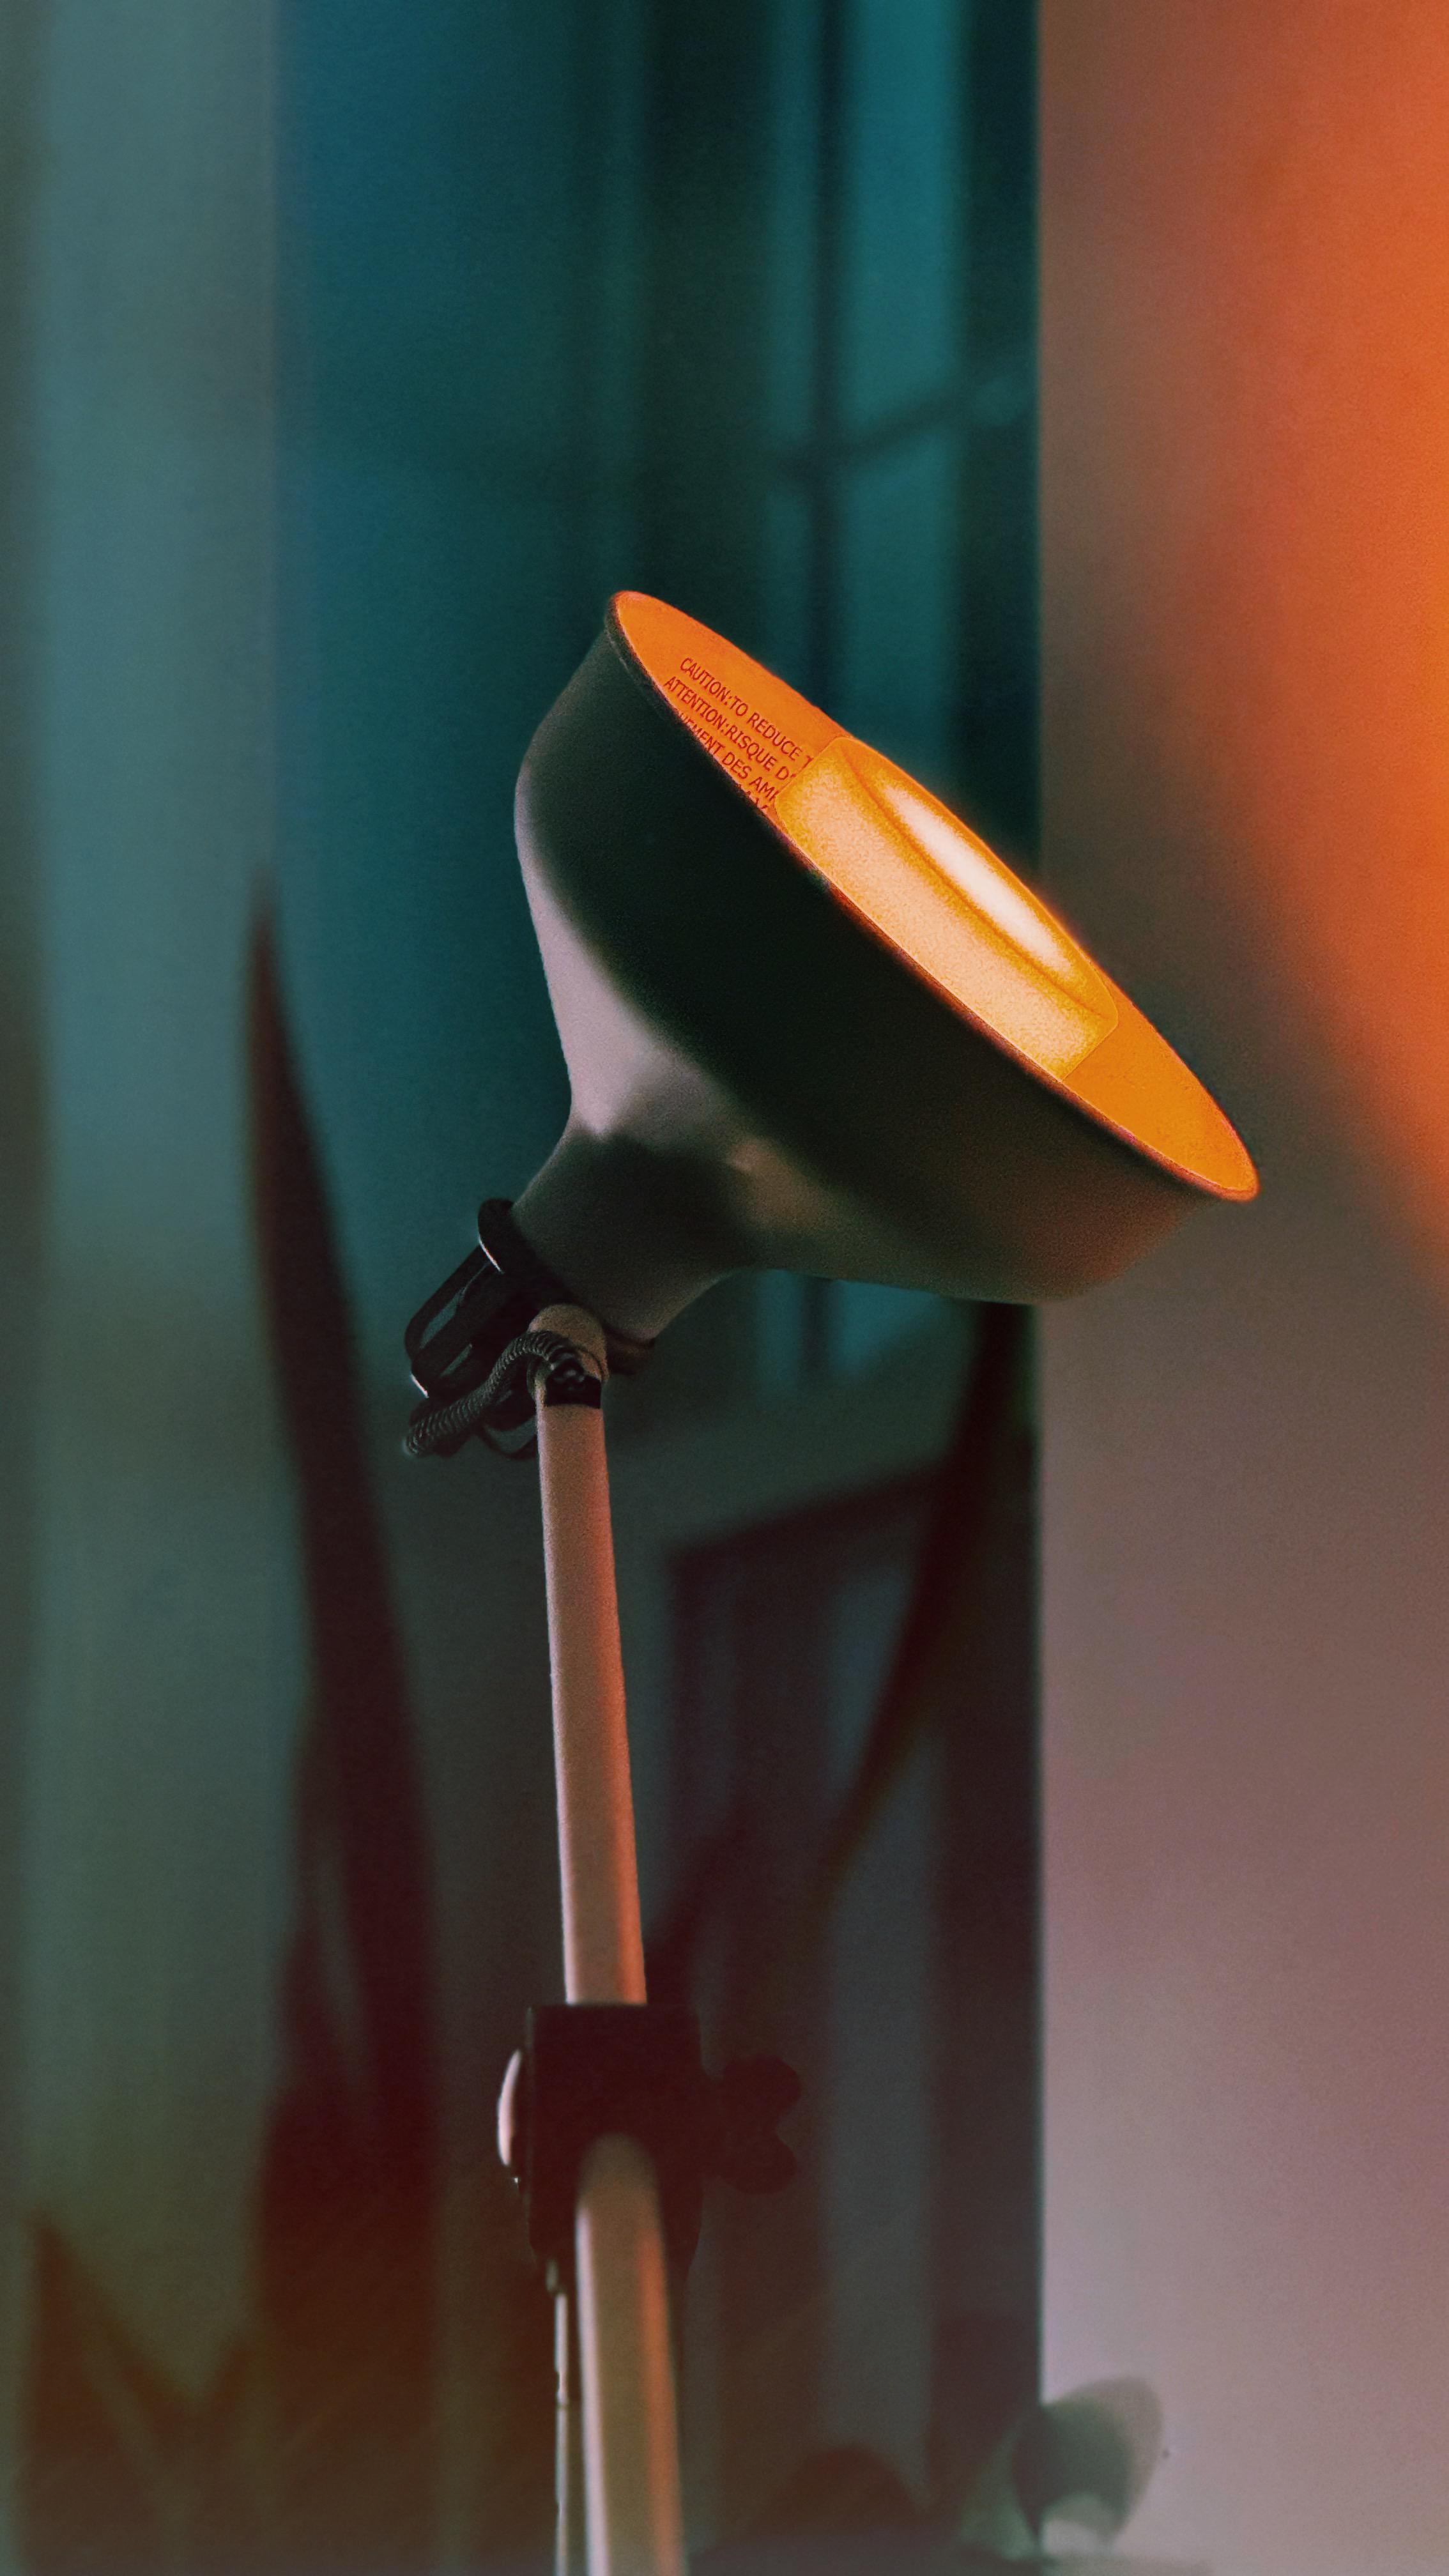
Appliances
The very first thing I did was make a list of devices that are in my current setup. I wanted to figure out a way to integrate all of these devices with this project (wasn't able to integrate all, but did get to work on the most essential ones).
Ideation
Layout
For the most part, I had a basic idea of what the end output would look like. As this particular dashboard was going to be dependent on the devices in my home, I'd kept it fairly simple.
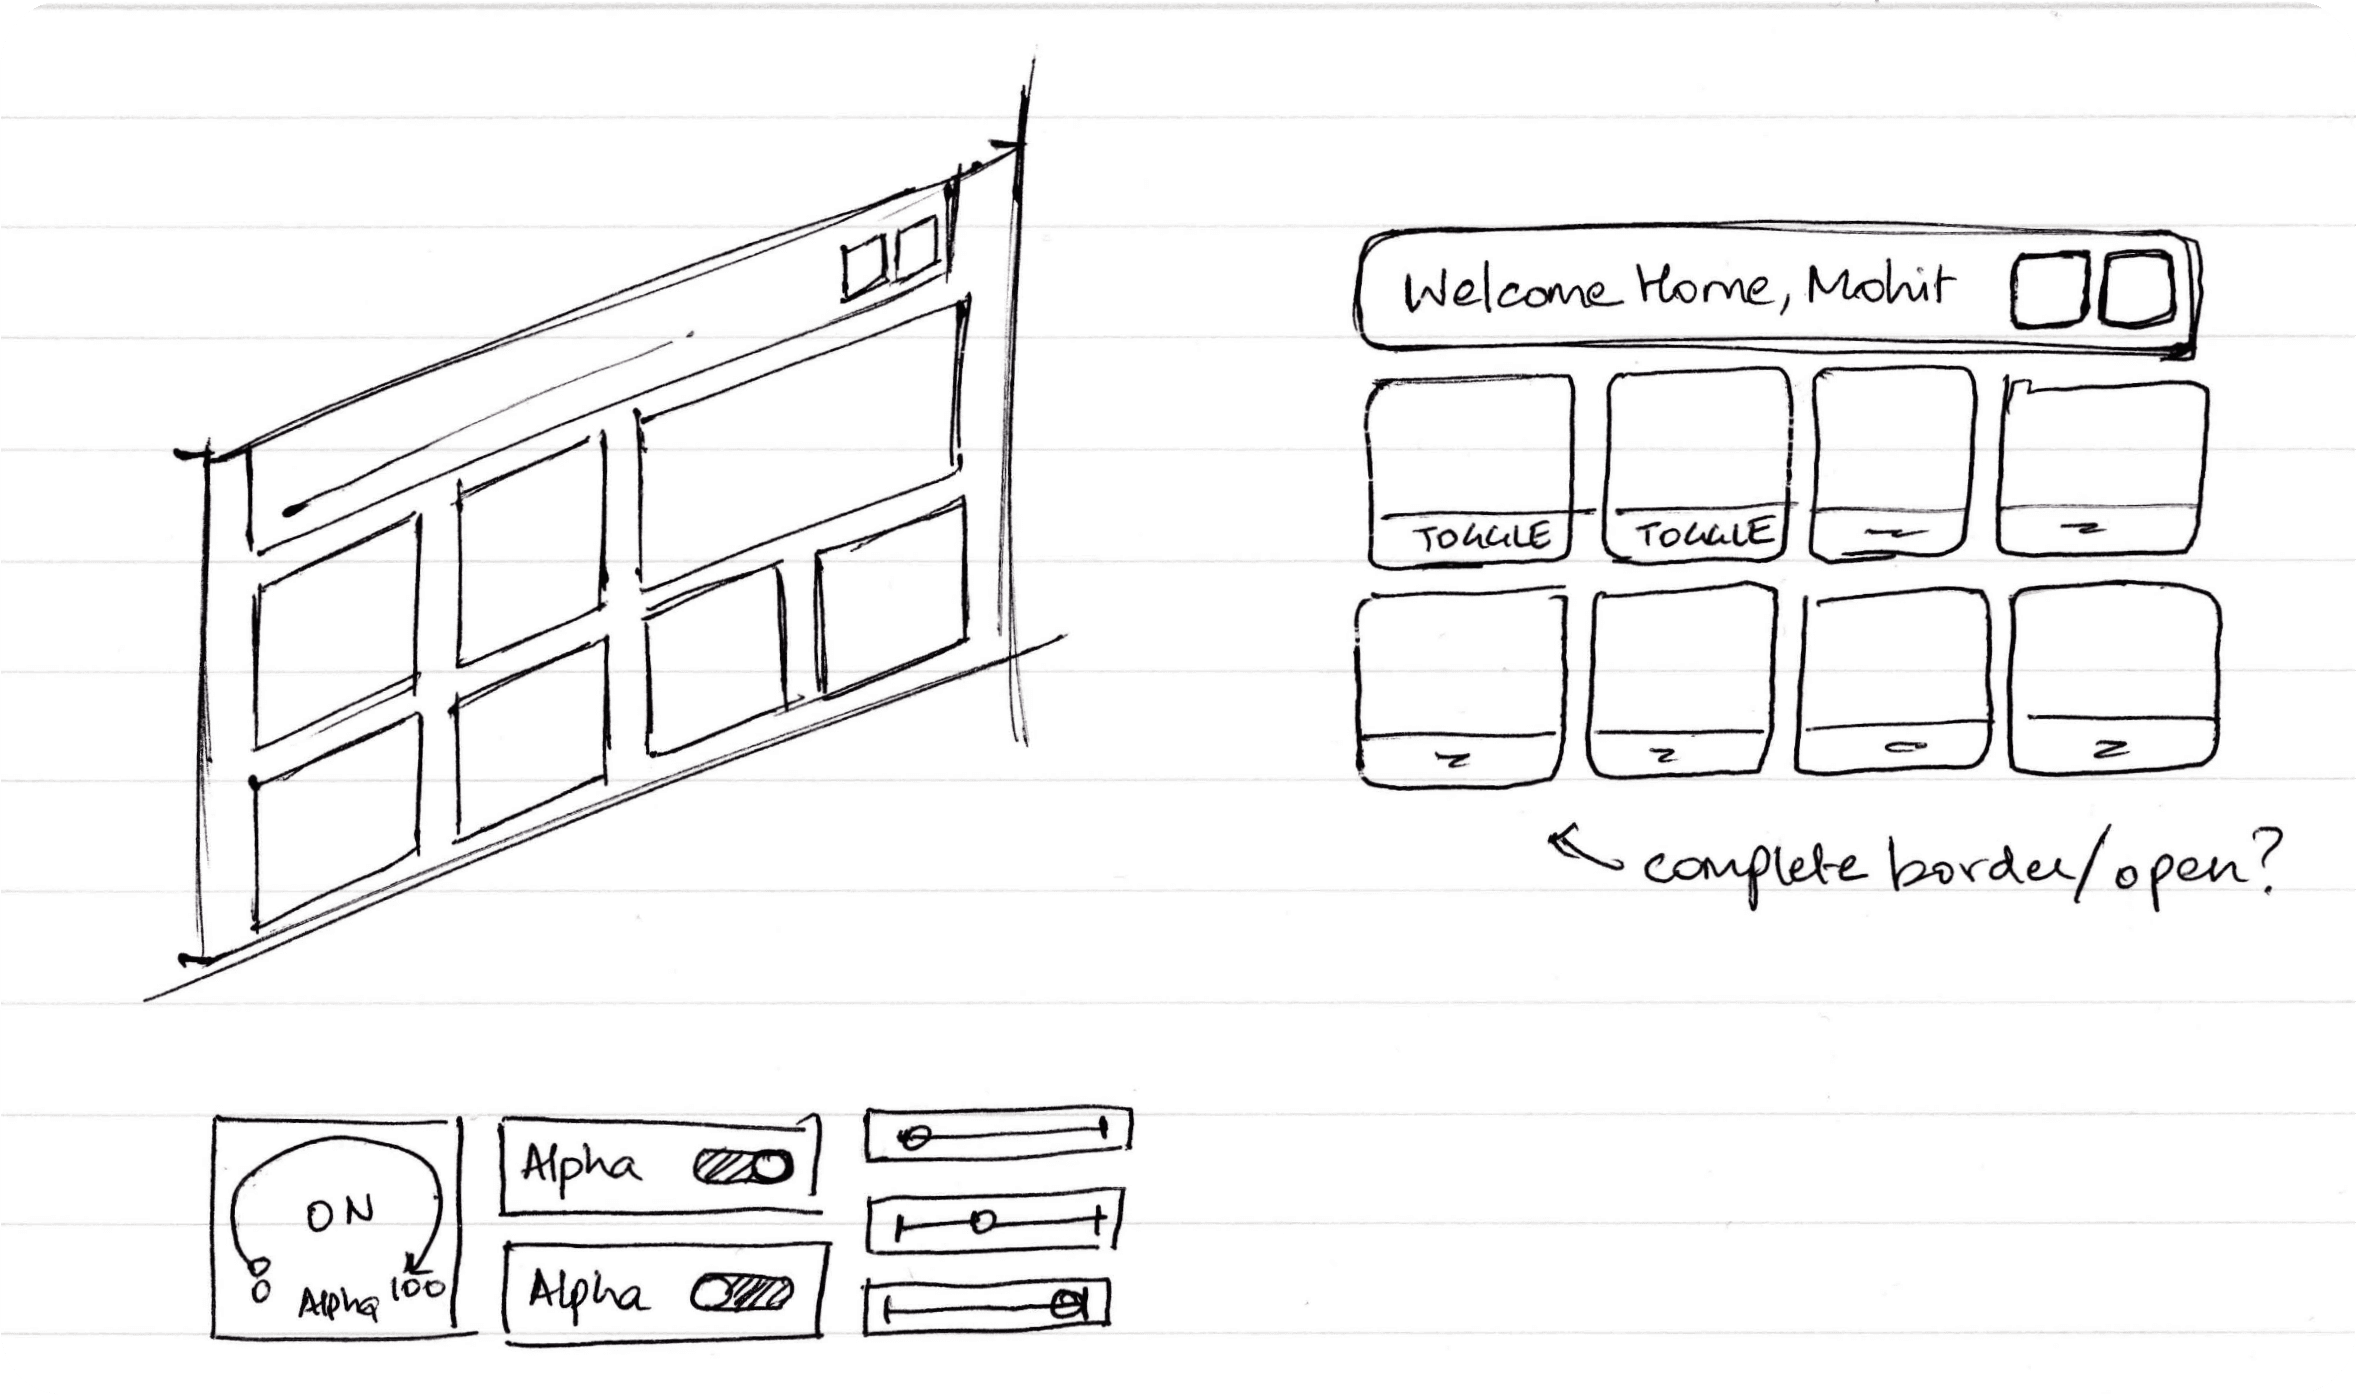
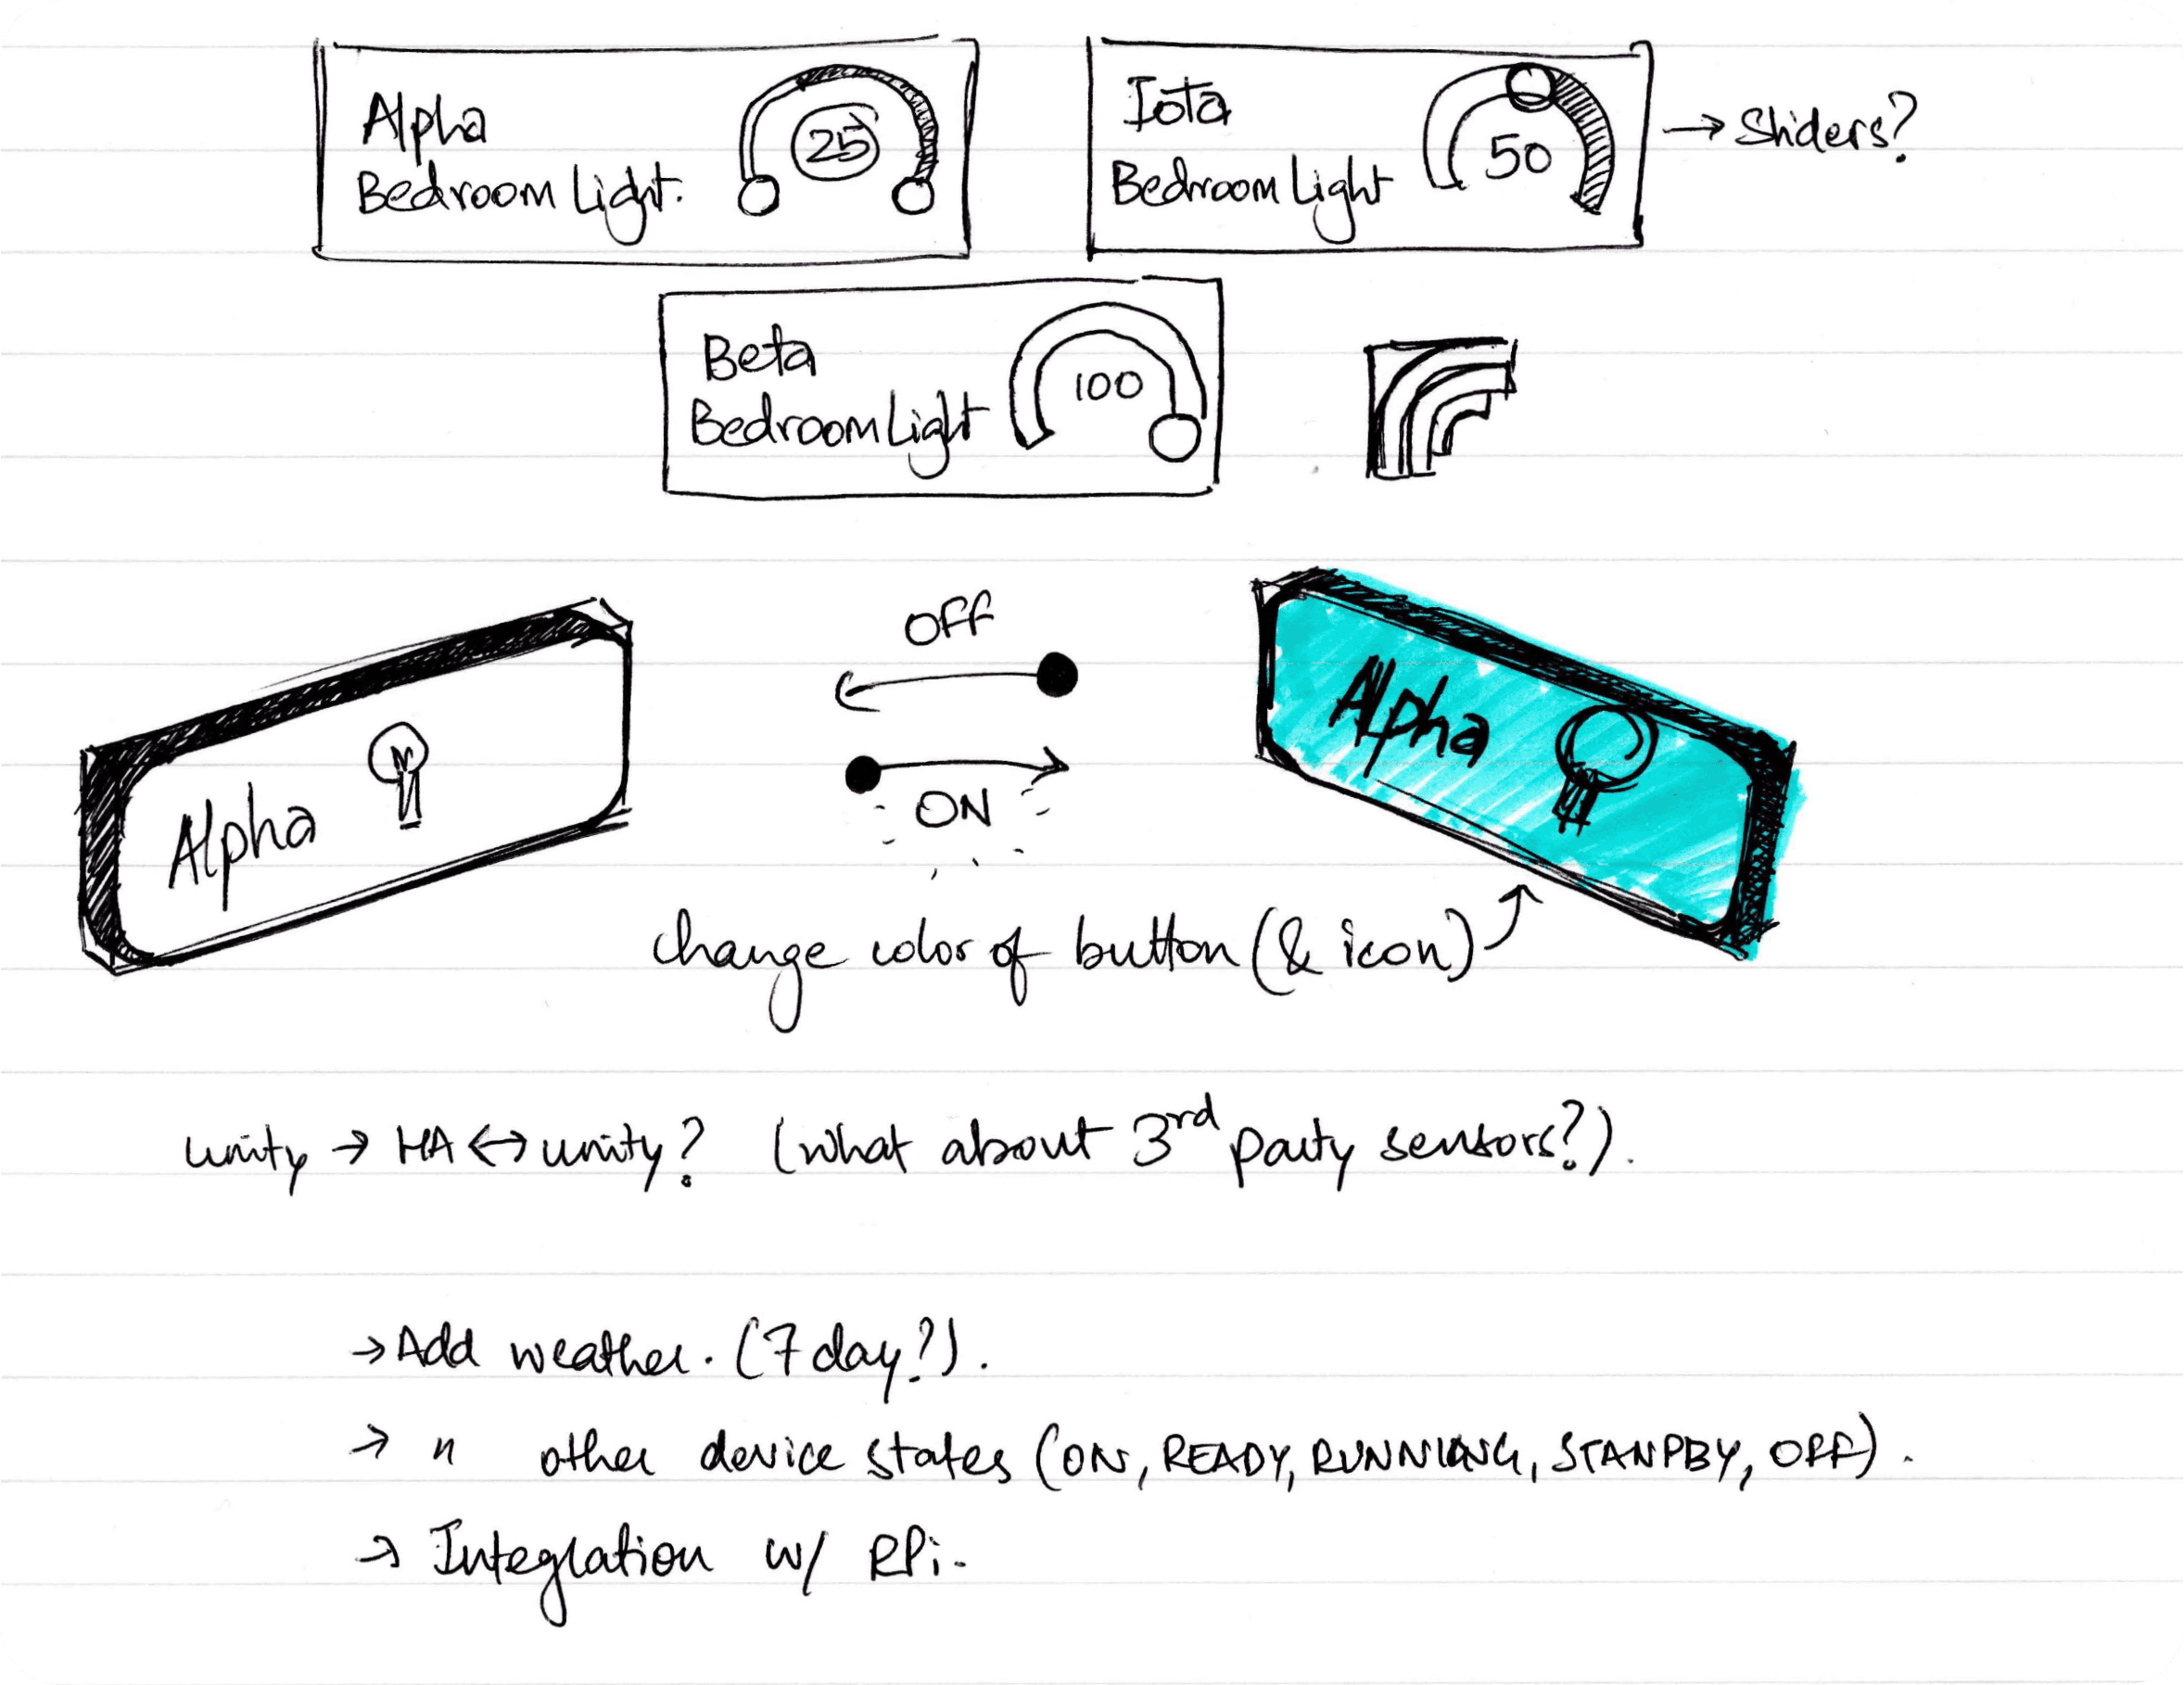
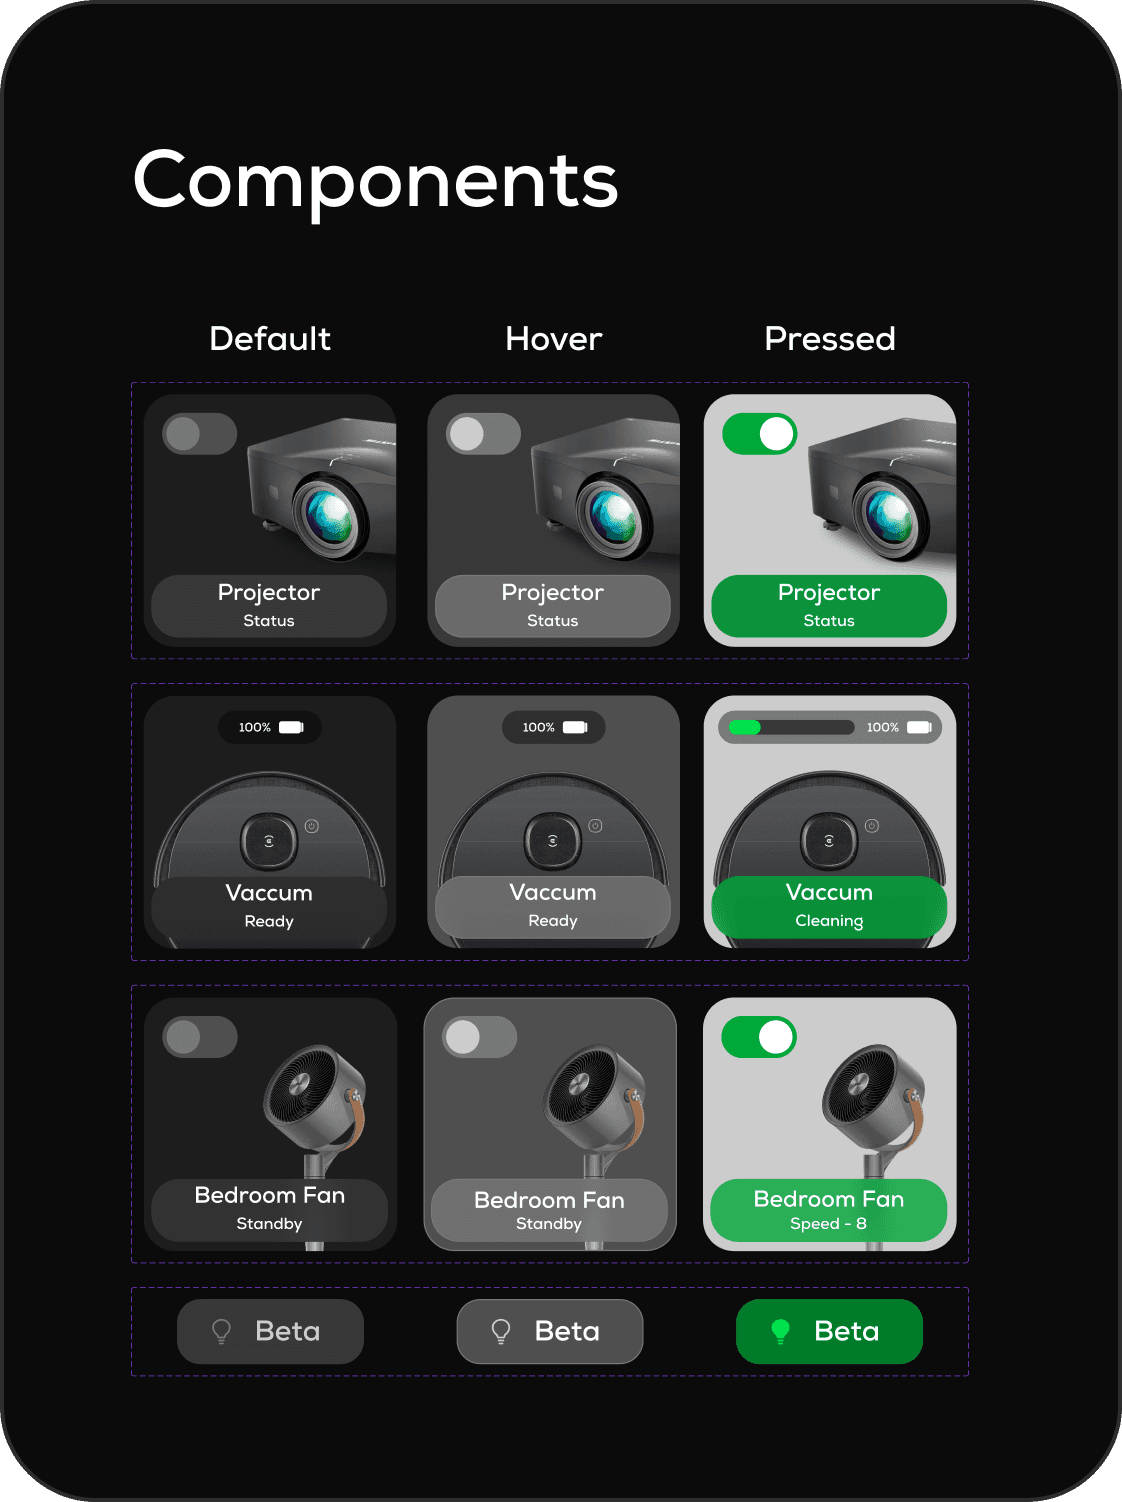
Buttons
There was however some back and forth between the various styles of buttons and their functionality. I did want to create functionality for controlling the brightness of the lights, but since this was just a demonstration it was out of the scope of this project.
Instead, I experimented with different styles of toggles/buttons that have on/off/hover states. I'd decided to use different colors to represent the state of the entity, instead of using a visible toggle (at least for the smaller buttons).
Crafting the experience
Iterative design
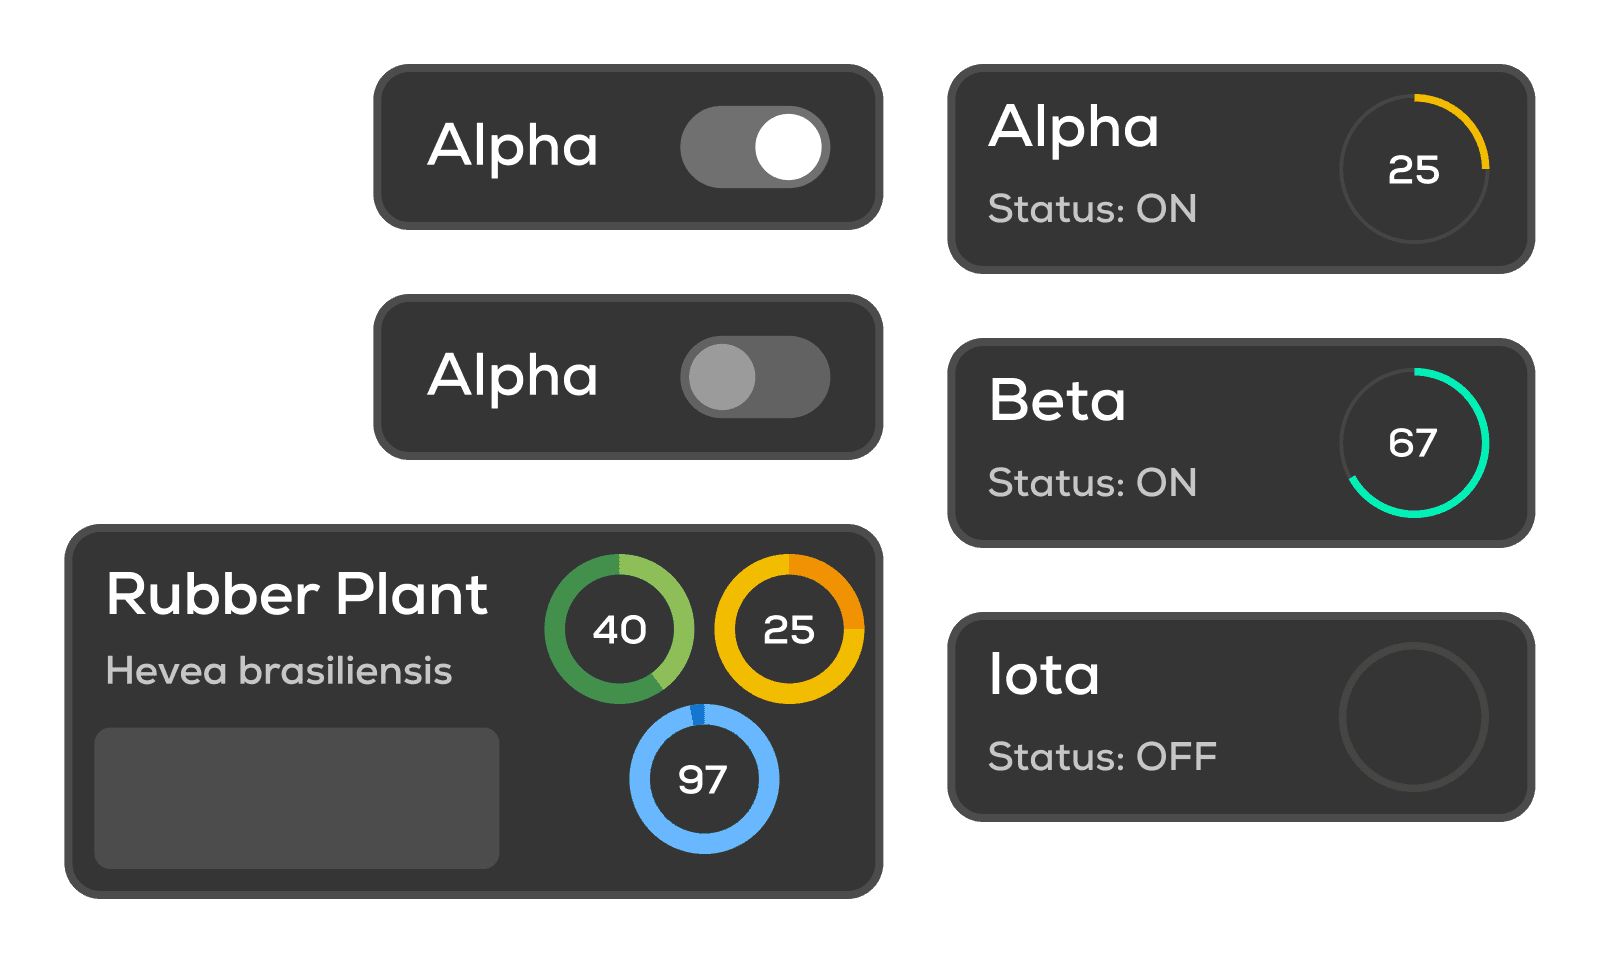
Experiments - Round 1
With my initial experimentations with the buttons, I did incorporate some of the radial slider features, but later realized that as clean as they might have looked, adjusting these with your hands (dragging across the radial slider) wouldn't have been a great method of interaction as the movement would be very constrained.
For the plants, I'd also made some indicators for the plant's health, light and water levels. (green, yellow and blue sliders respectively)
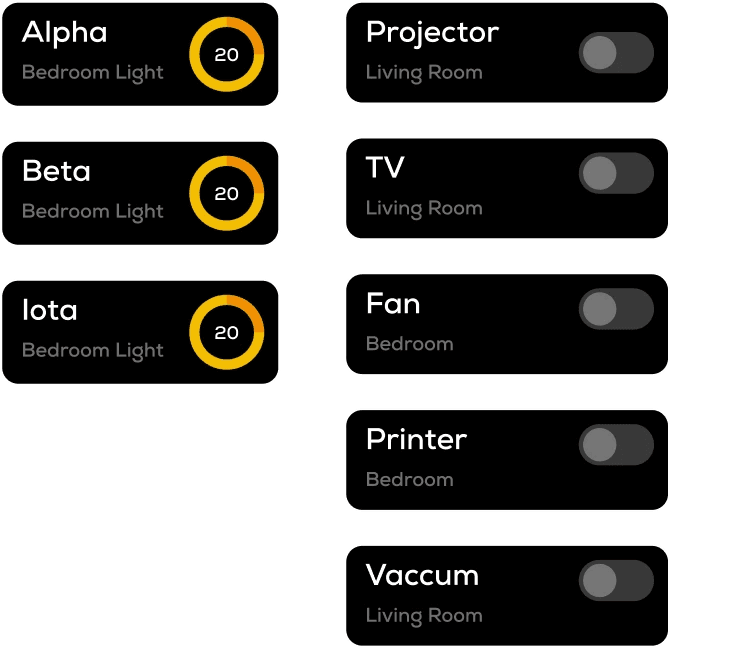
Experiments - Round 2
For Round 2, I wanted to keep things simple with a high contrast outline and fill colors. This is because by this point I'd started experimenting with Unity and was working on making things functional. So instead of focusing too much on the UI design early on in the process, I simplified the buttons and proceeded to development.


Realizing the vision
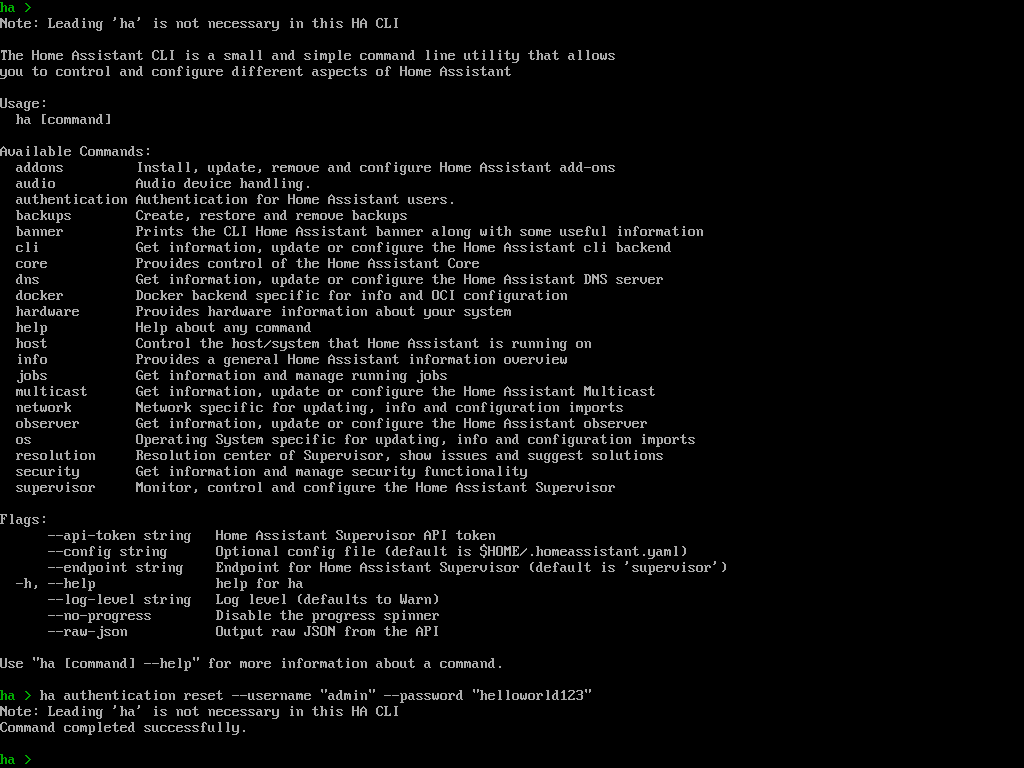
Home of the Assistant
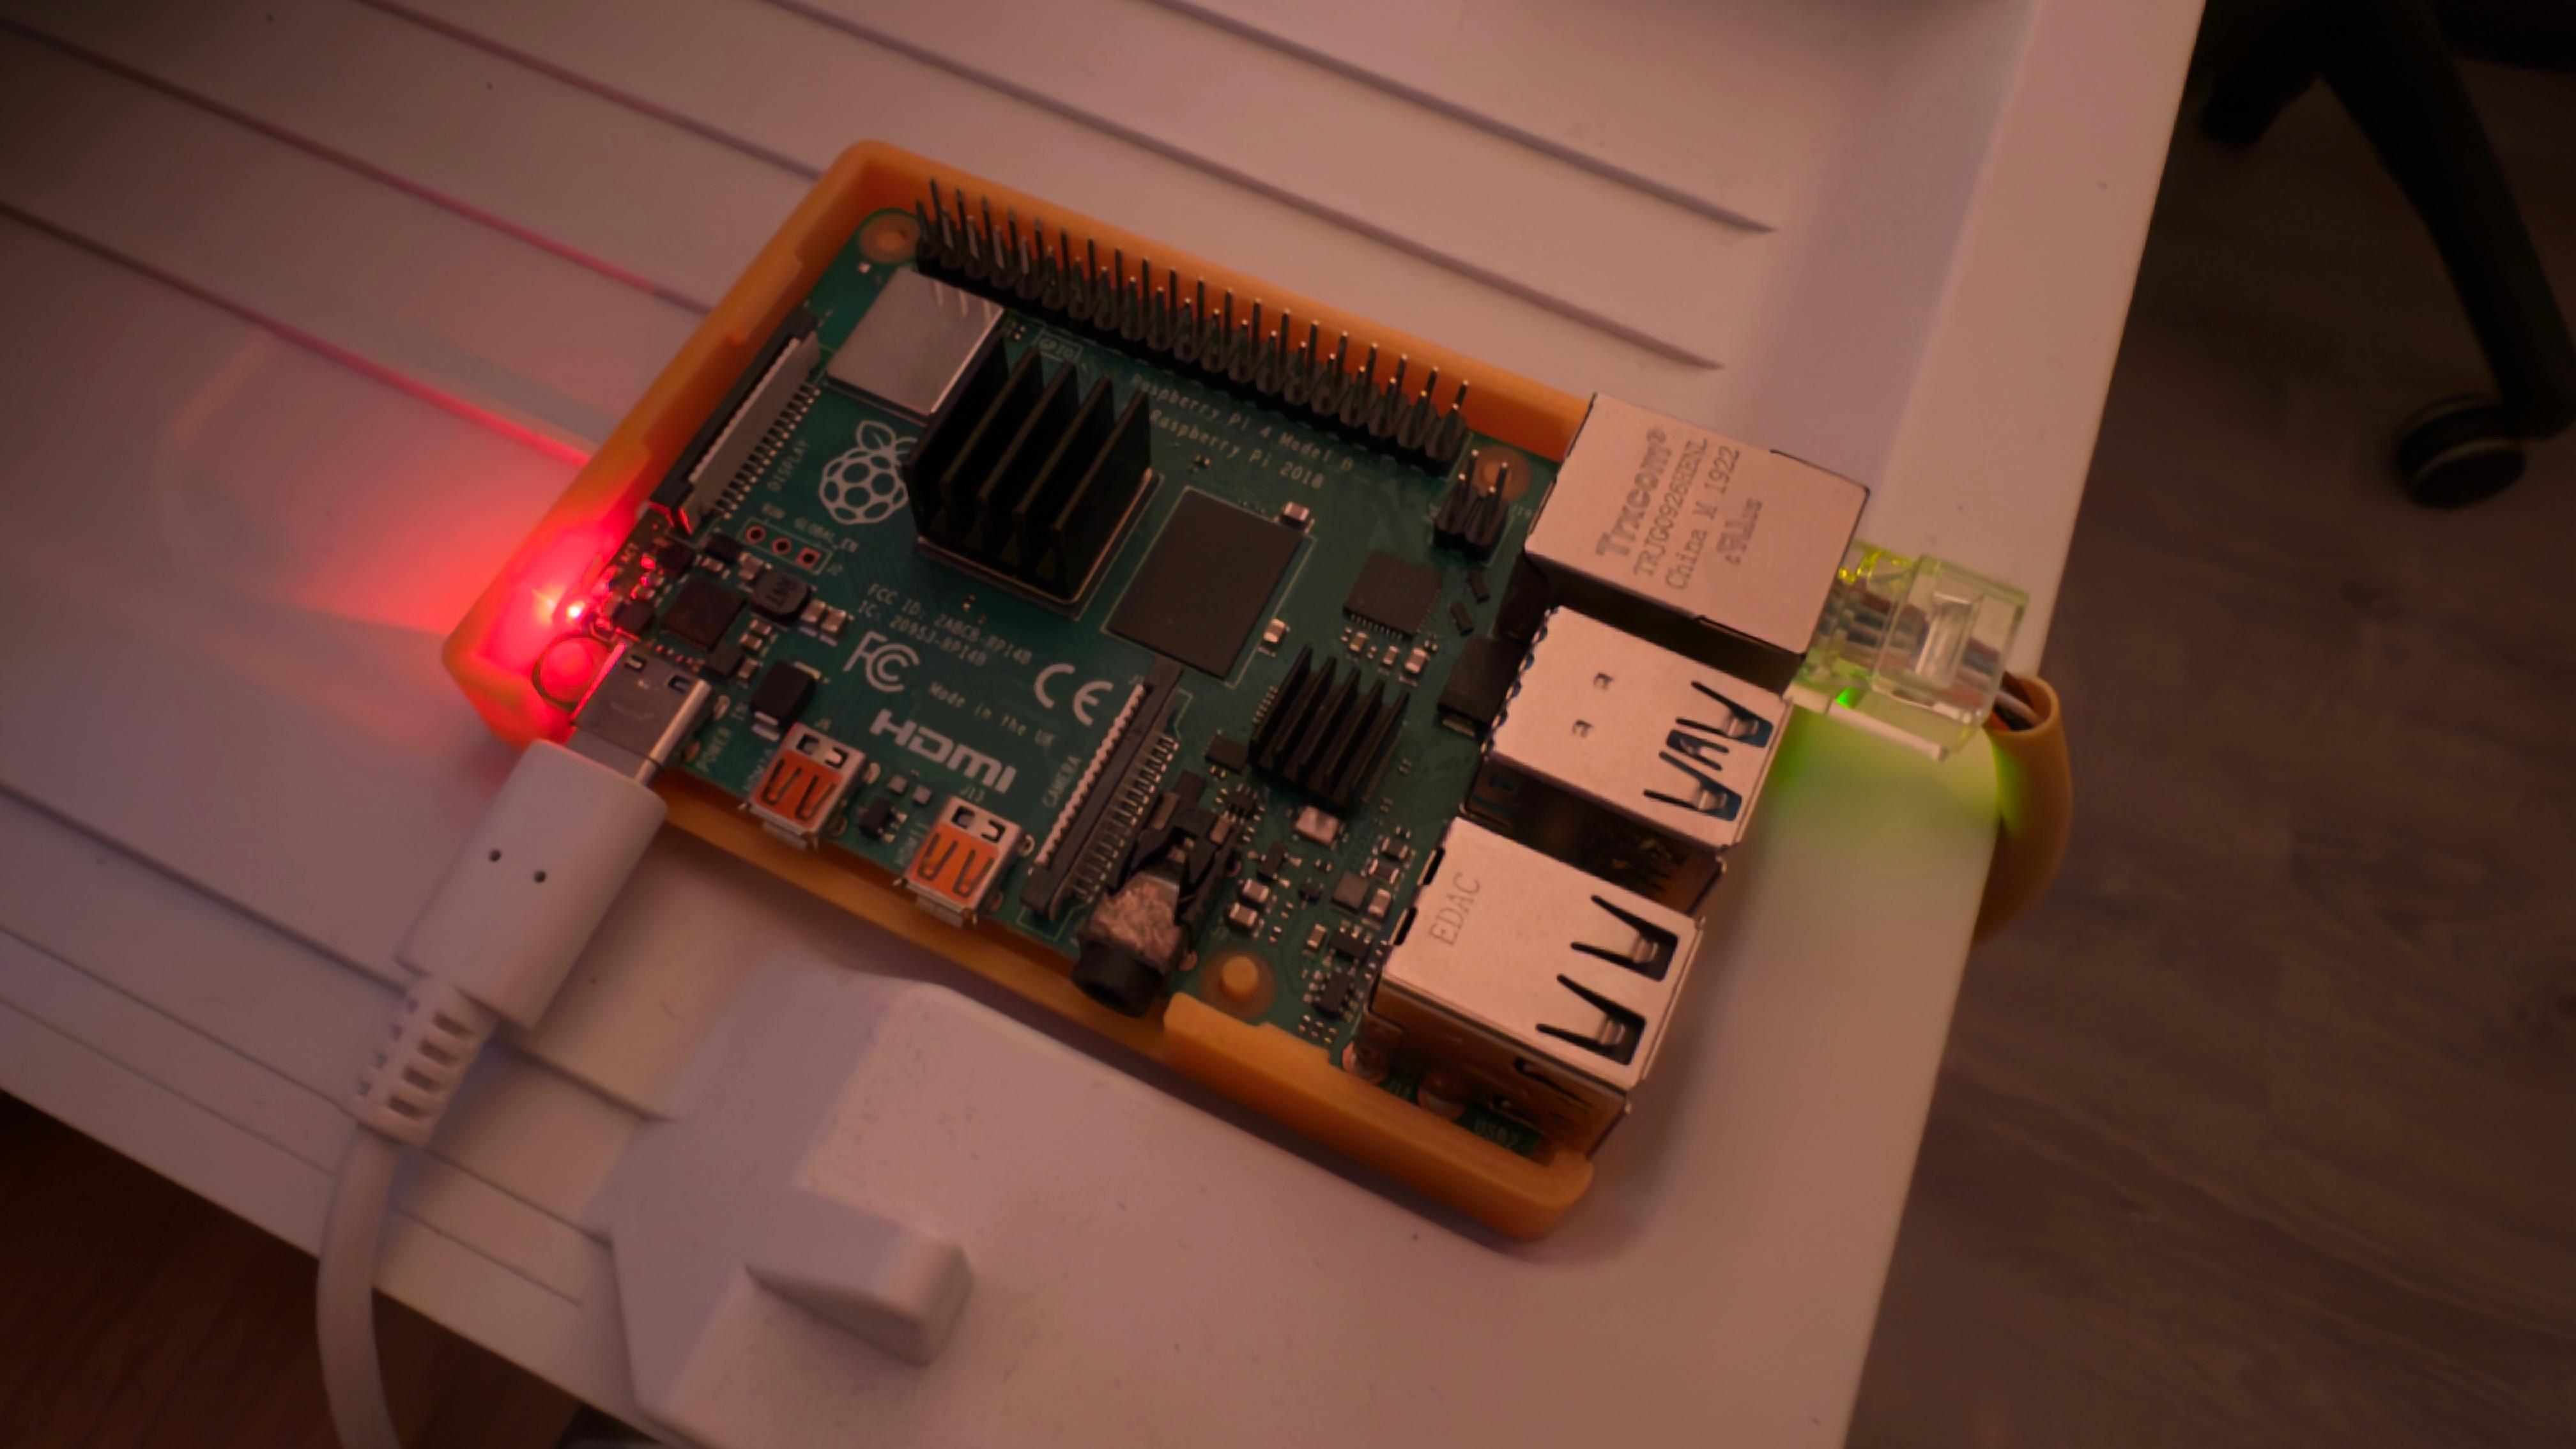
The entire "brain" behind controlling all of these devices was loaded on a credit card sized computer, a Raspberry Pi 4.


Google Home Integration
For some of the devices that couldn't be commanded directly, I used my existing google home to send TTS messages.
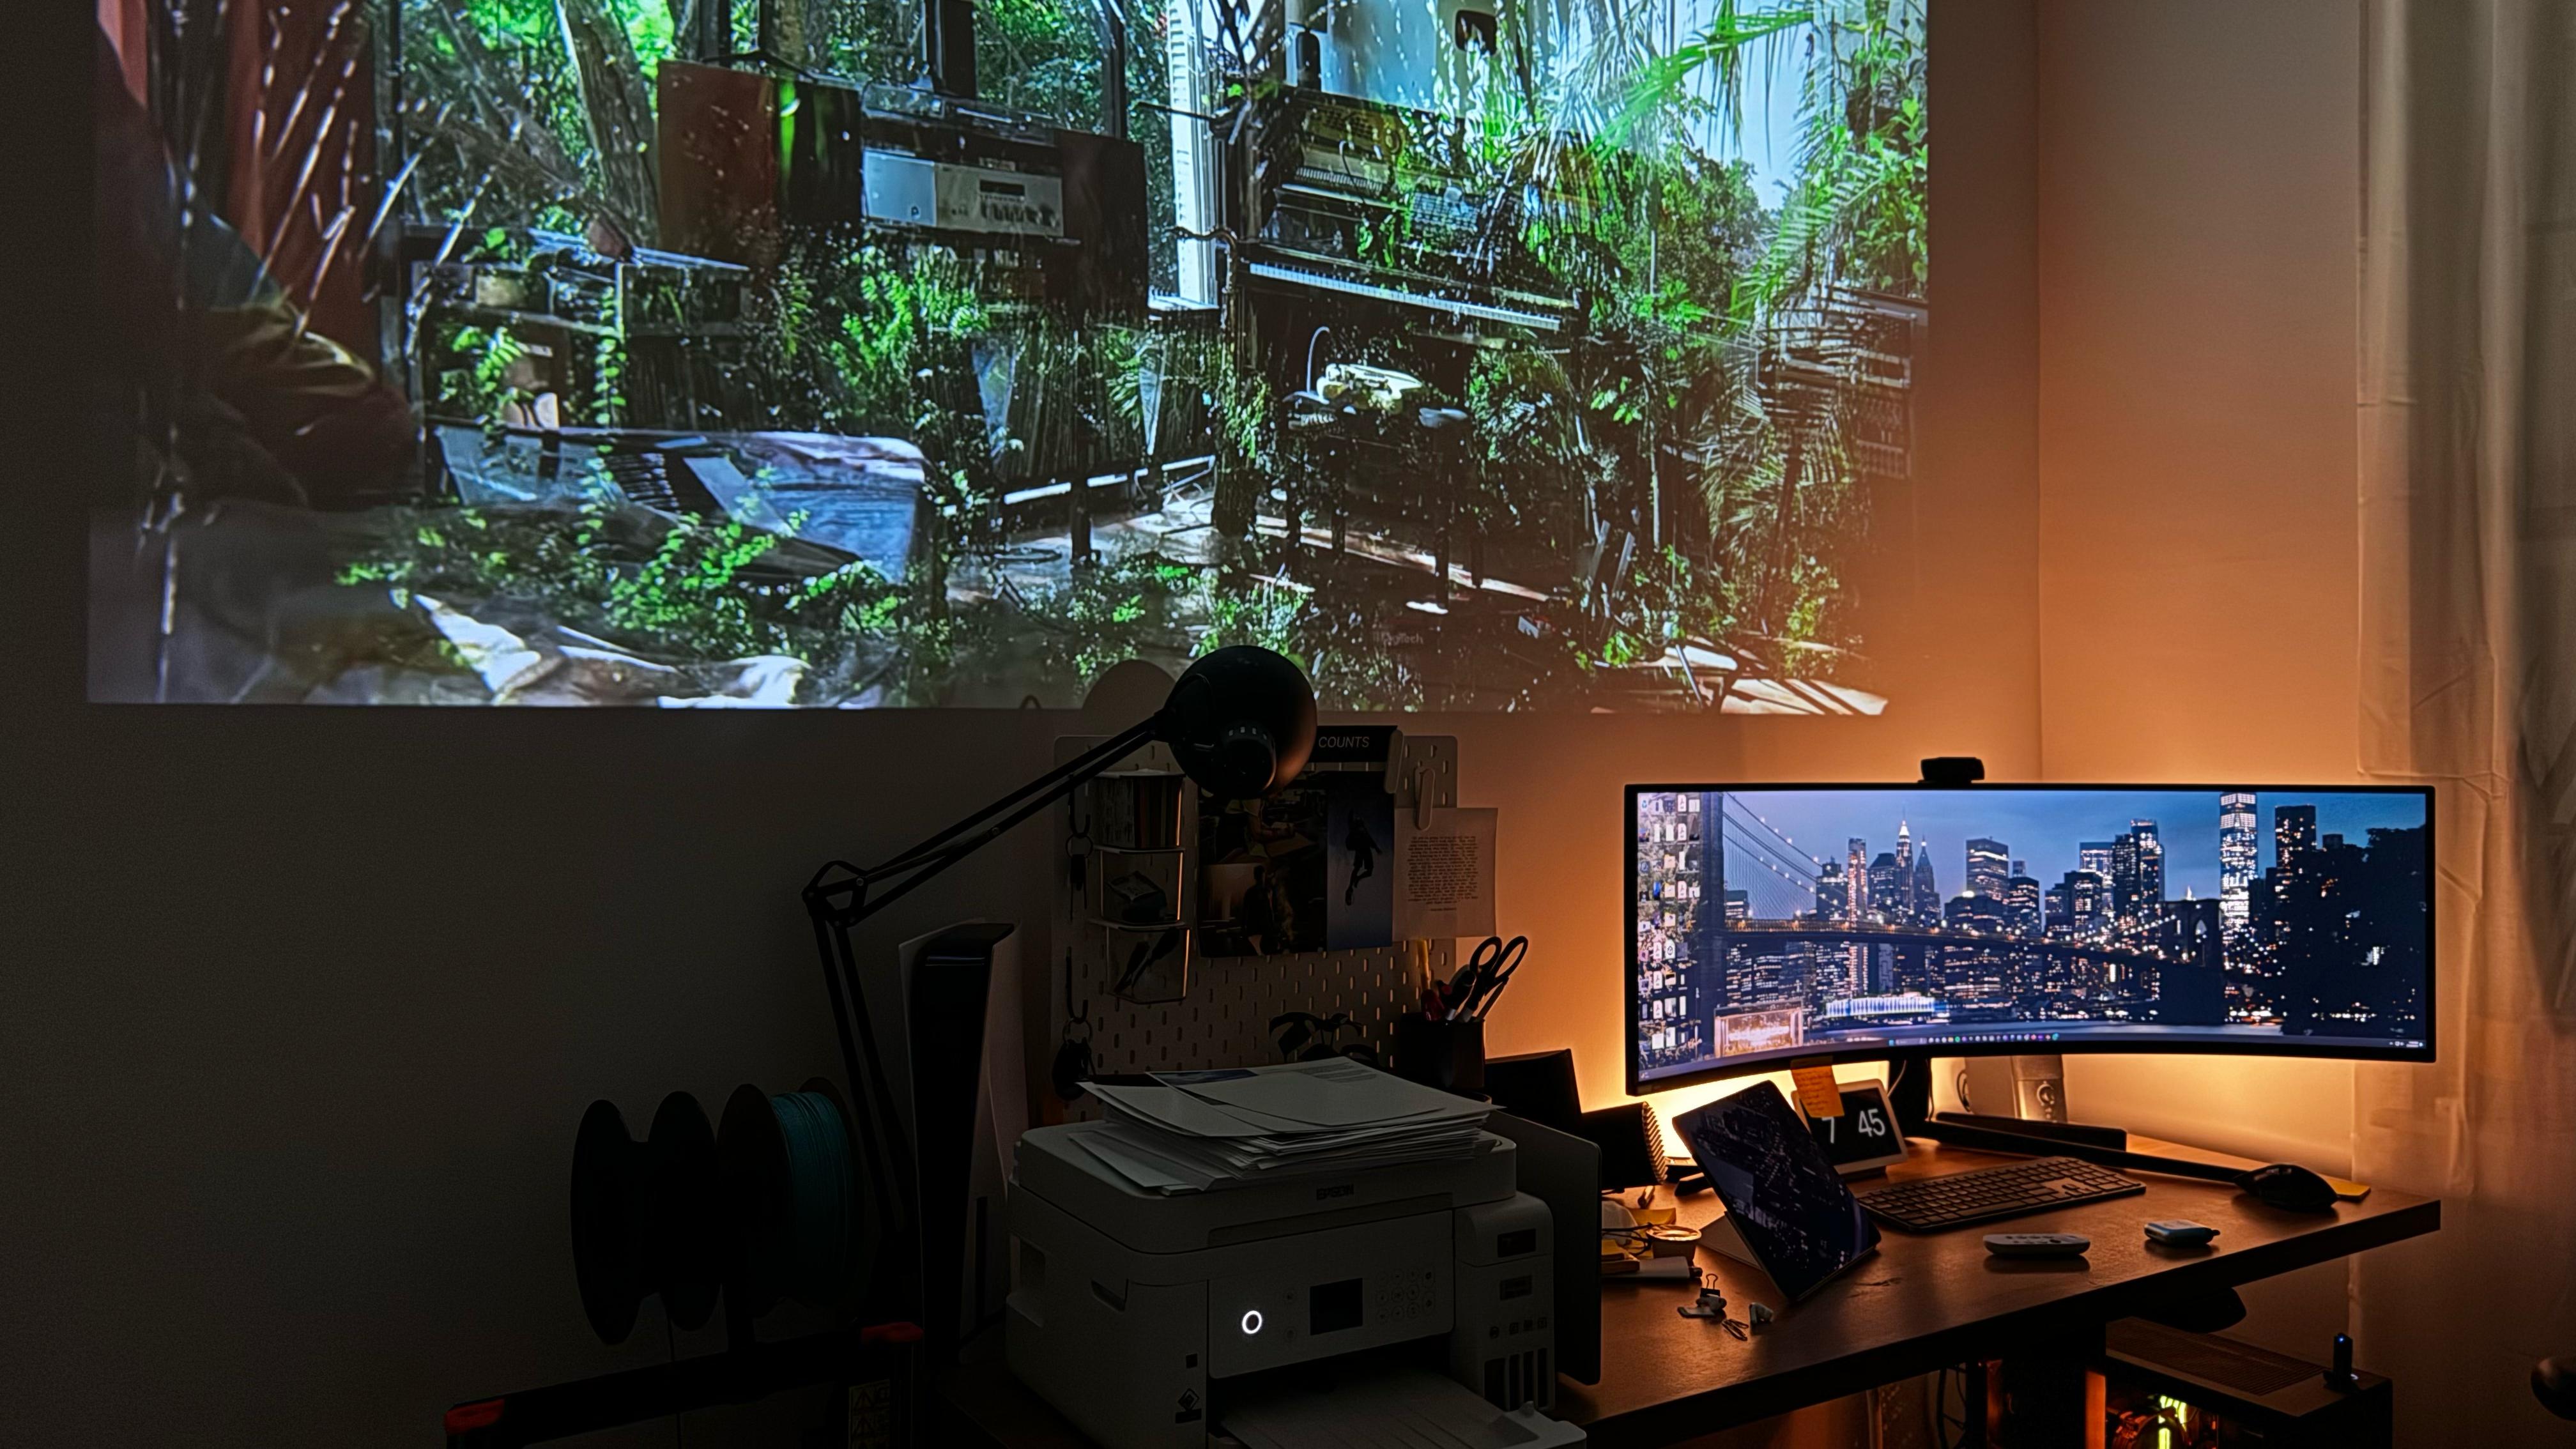
Projector
Adding controls to operate the projector was vital for this application.
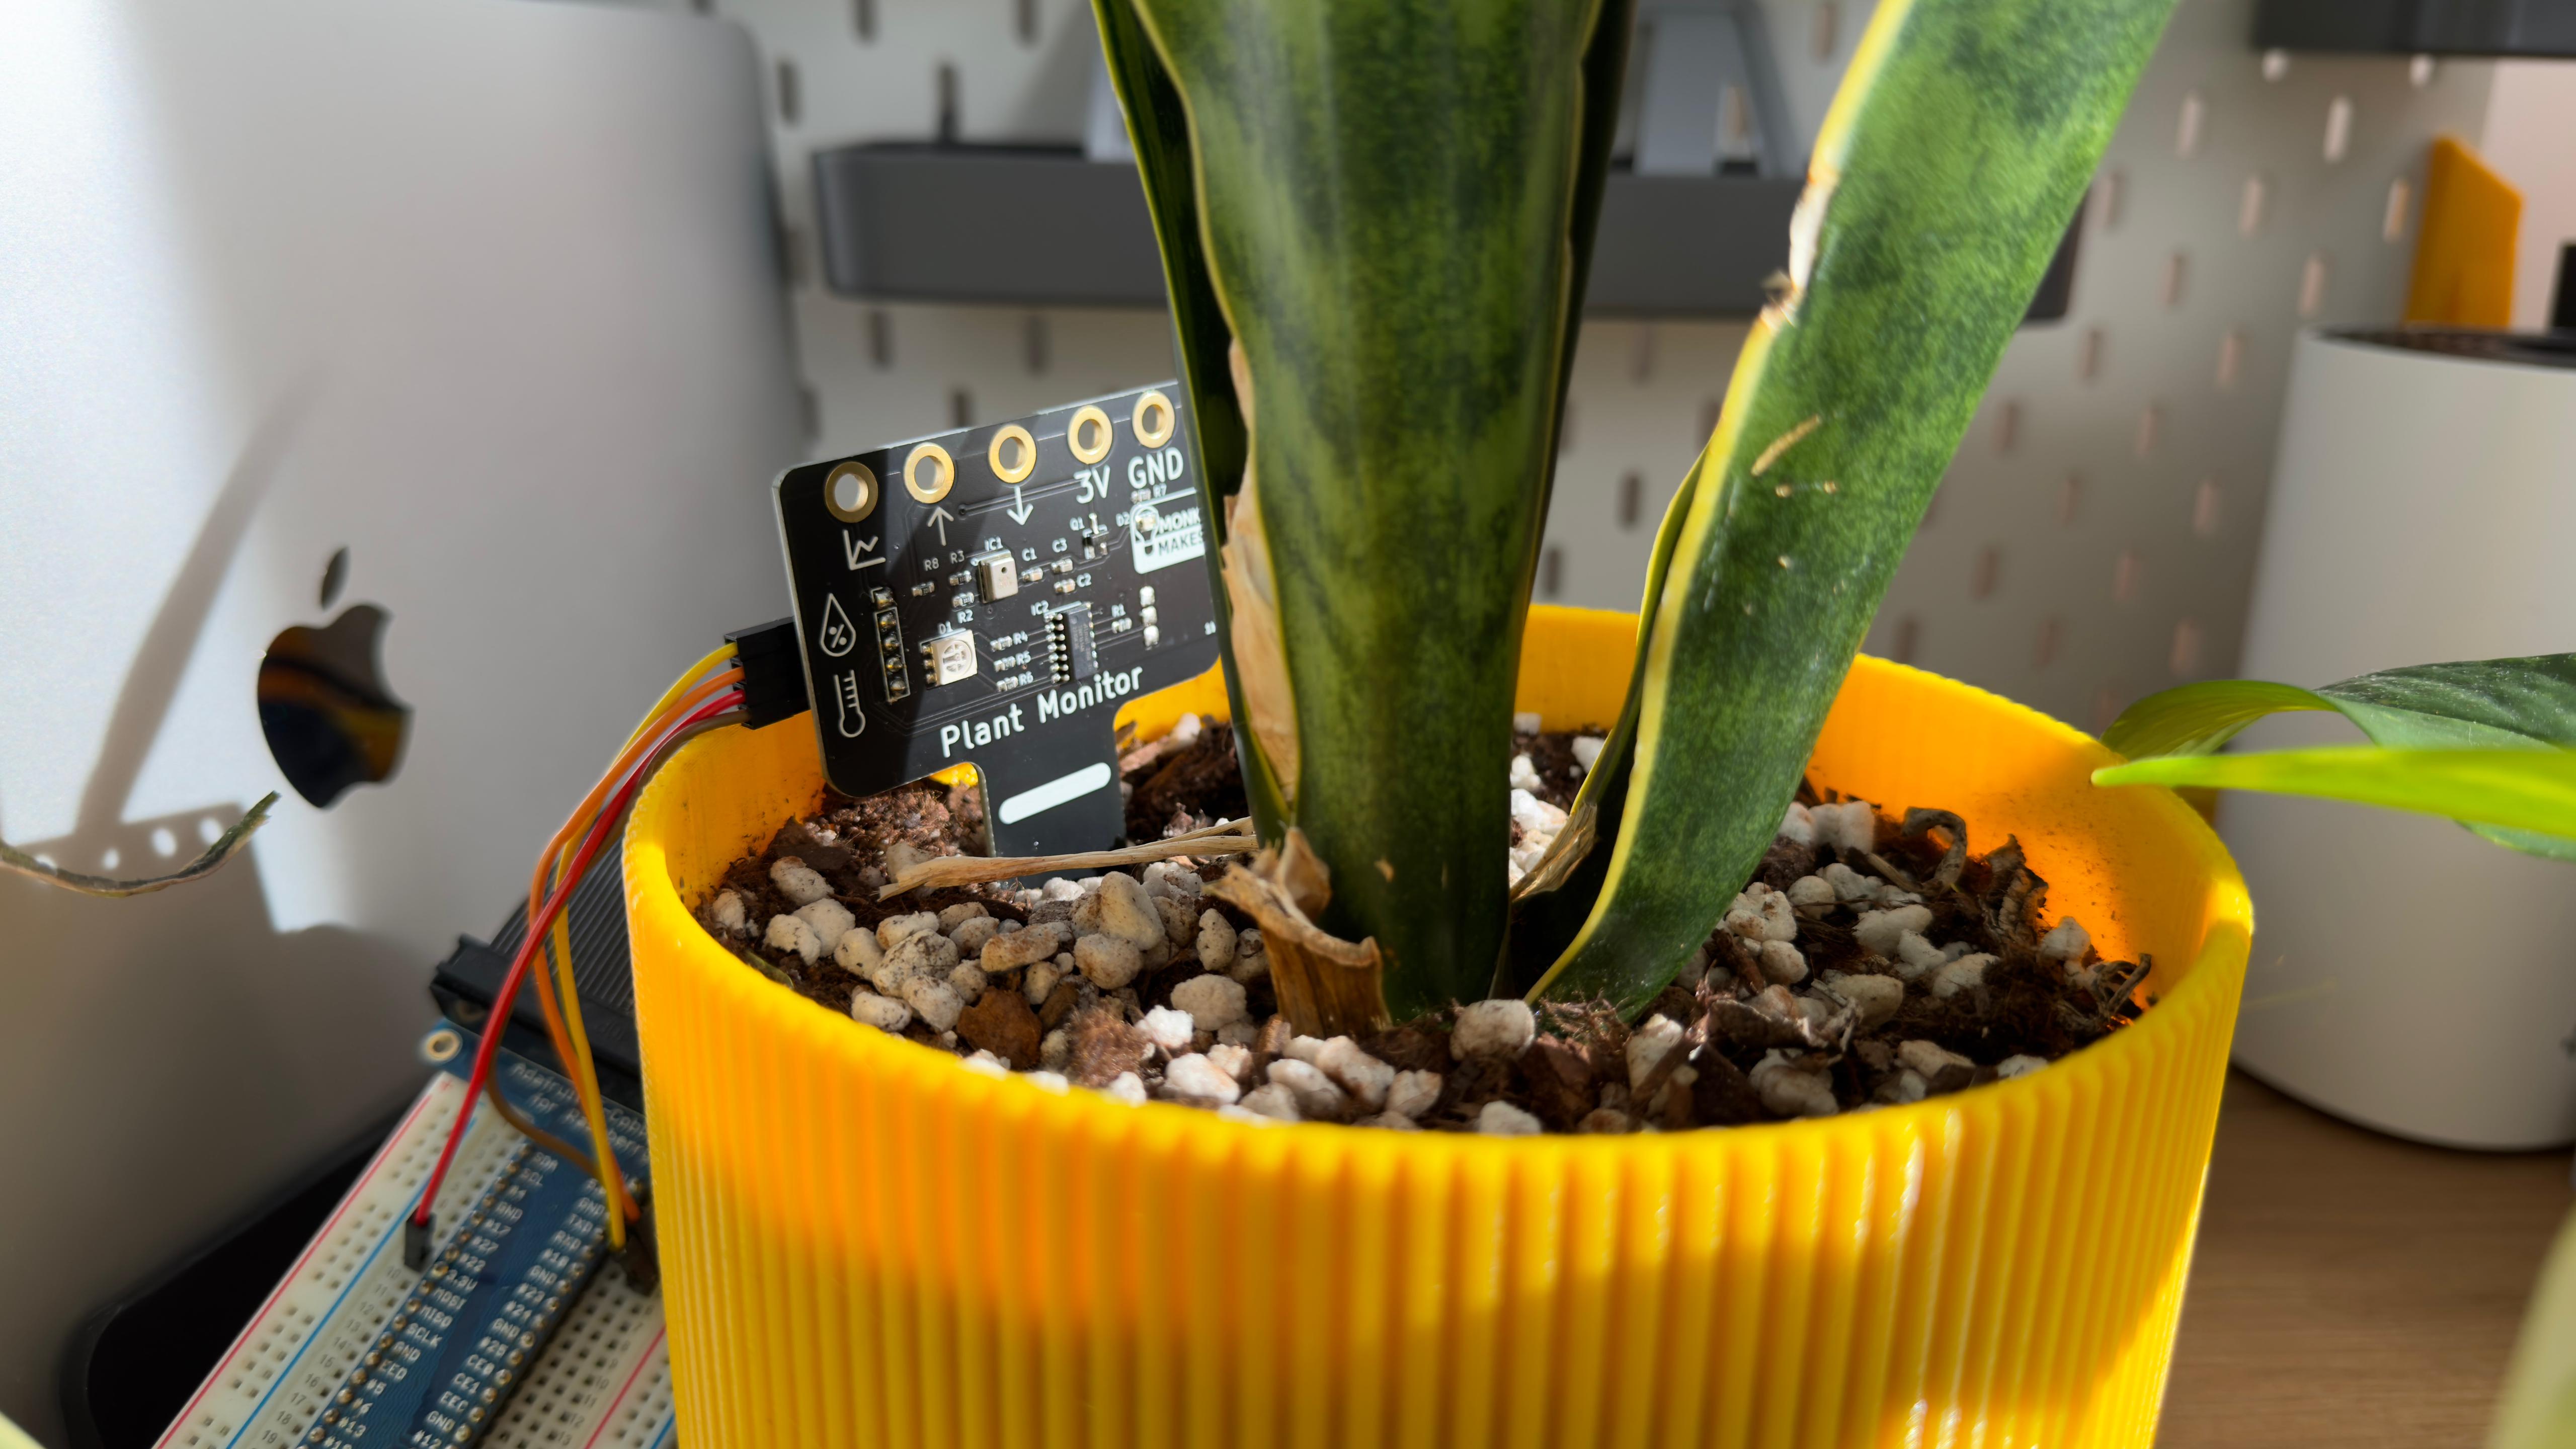
Experimenting with soil sensors
One of the ideas was to implement a soil sensor and link it to Home Assistant, but didn't end up moving forward in this direction.
Prototyping
Below are some of the experiments I did with the Meta Quest while working on this project.
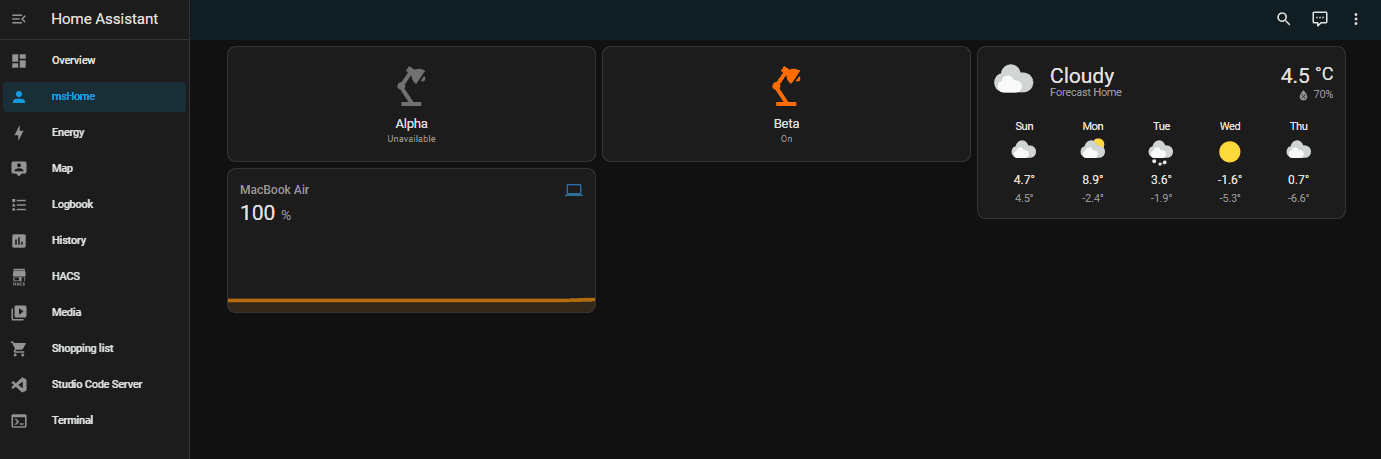
Testing on the Meta Quest browser
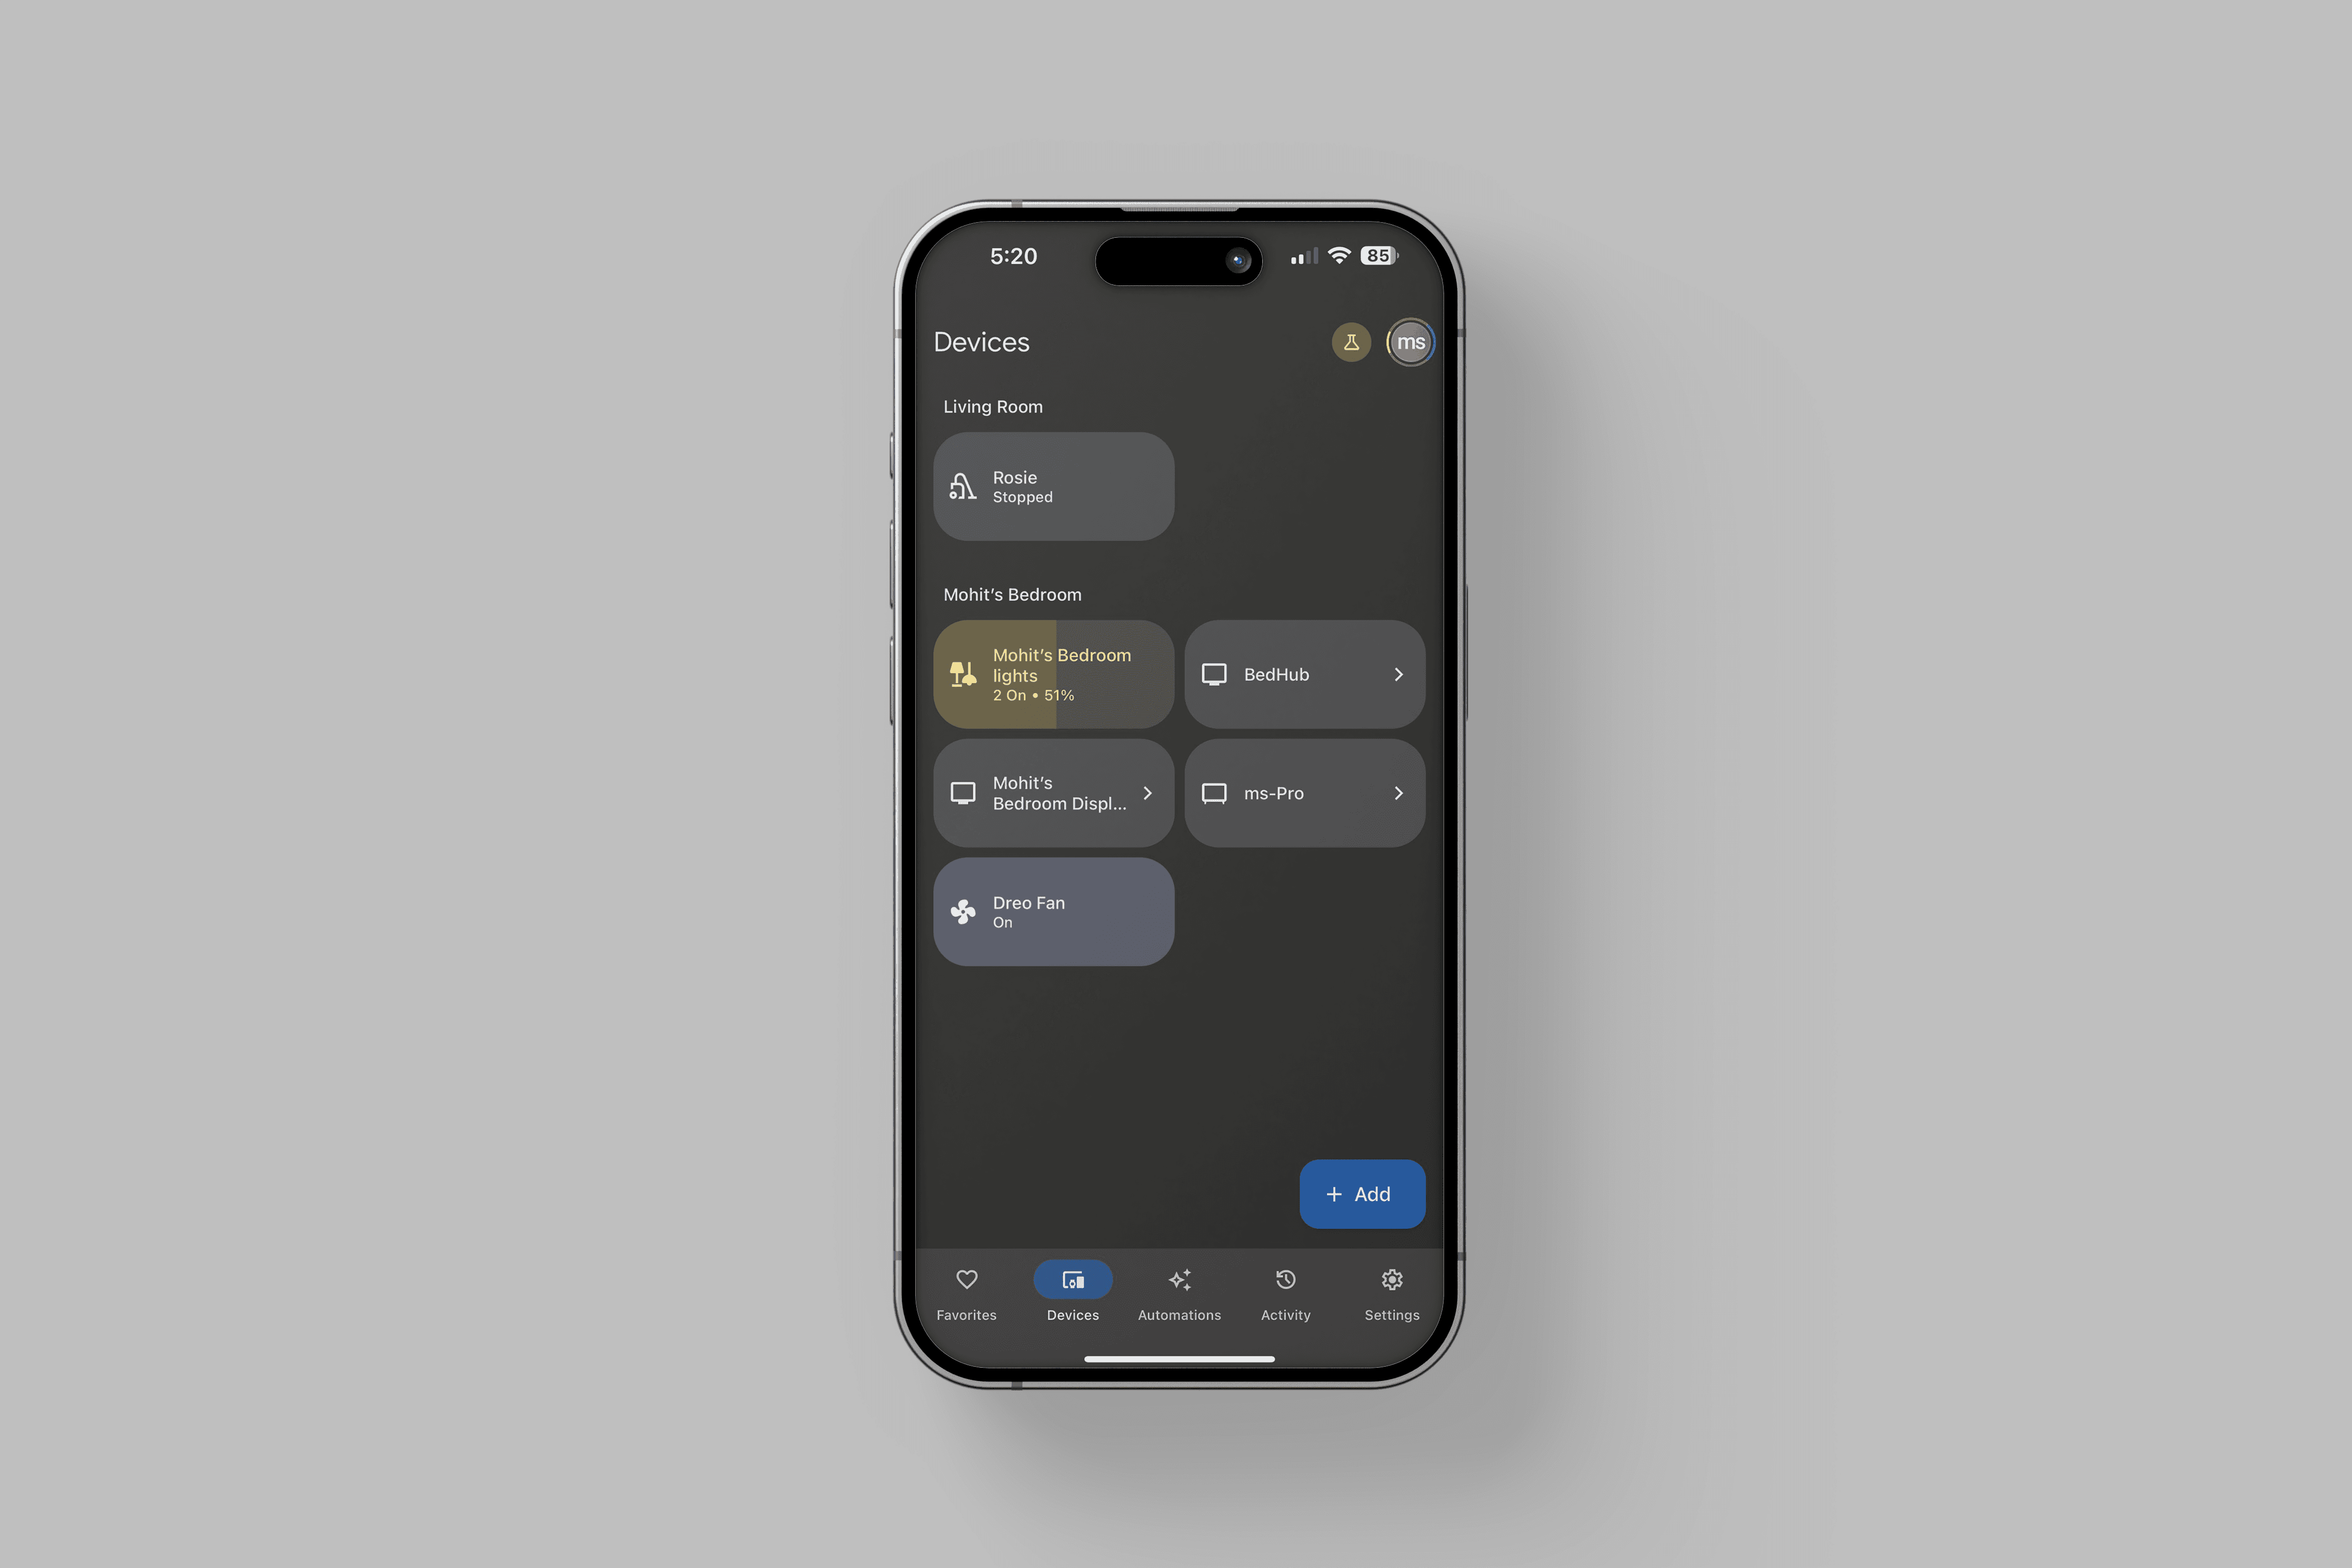
Since Home Assistant can be accessed through the browser, I first wanted to test if it was possible to control my connected devices using the browser on the quest.
Since tapping with your finger are detected as "clicks", it was fairly straightforward to use the browser dashboard.
Testing button clicks with Unity build
This was another test to confirm if button presses trigger the devices remotely. Successfully completing this test confirmed two things:
1. This project now has an MVP.
2. All other devices can be linked, as the message passing protocol (MQTT) will just be sending information for automations (more on this later)
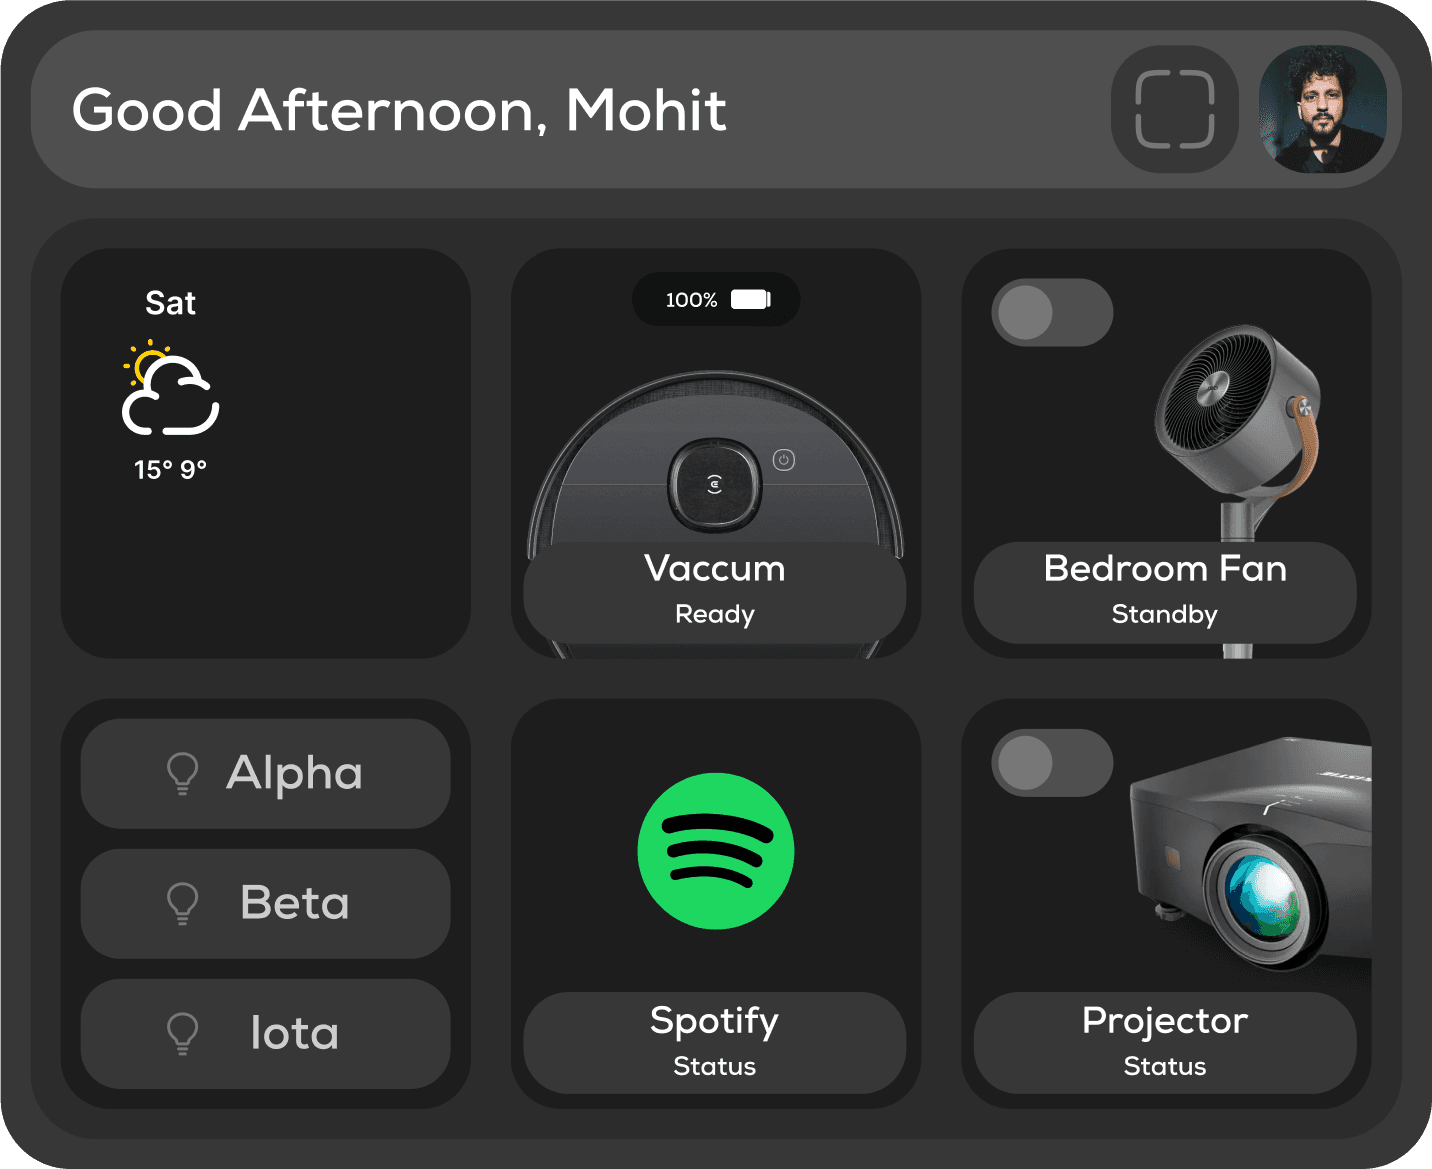
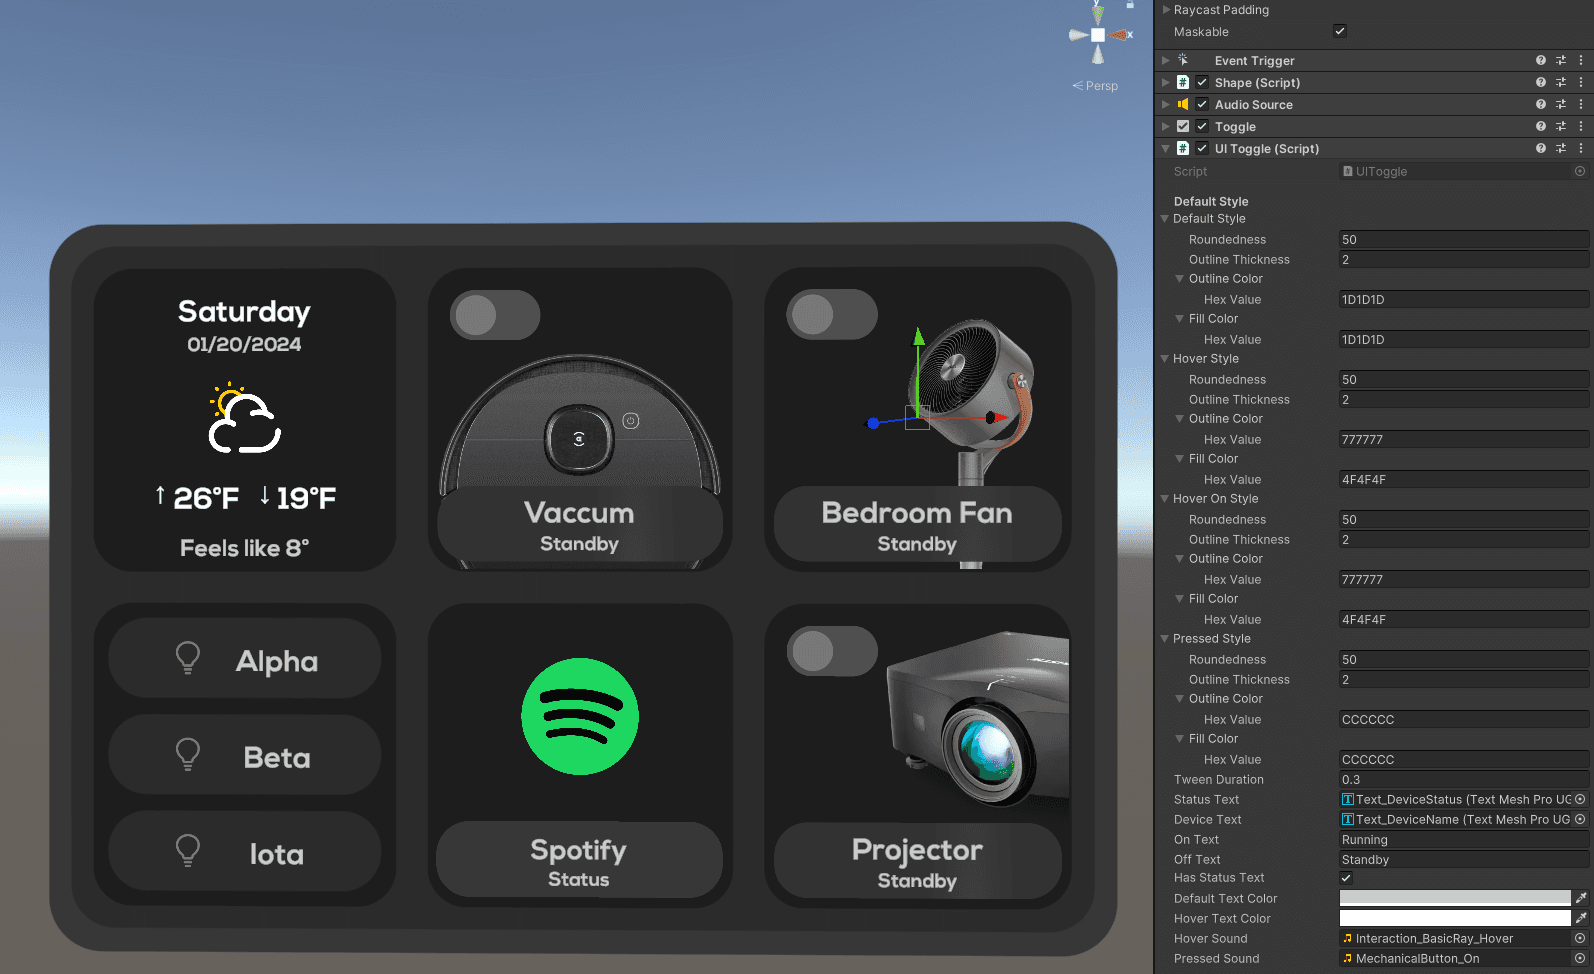
Creating the dashboard
Moving forward with the design style that I'd created earlier, I made a script in Unity to be as modular as possible, taking in HEX values for the various component states and divided the buttons into small and large button categories.
Under the hood
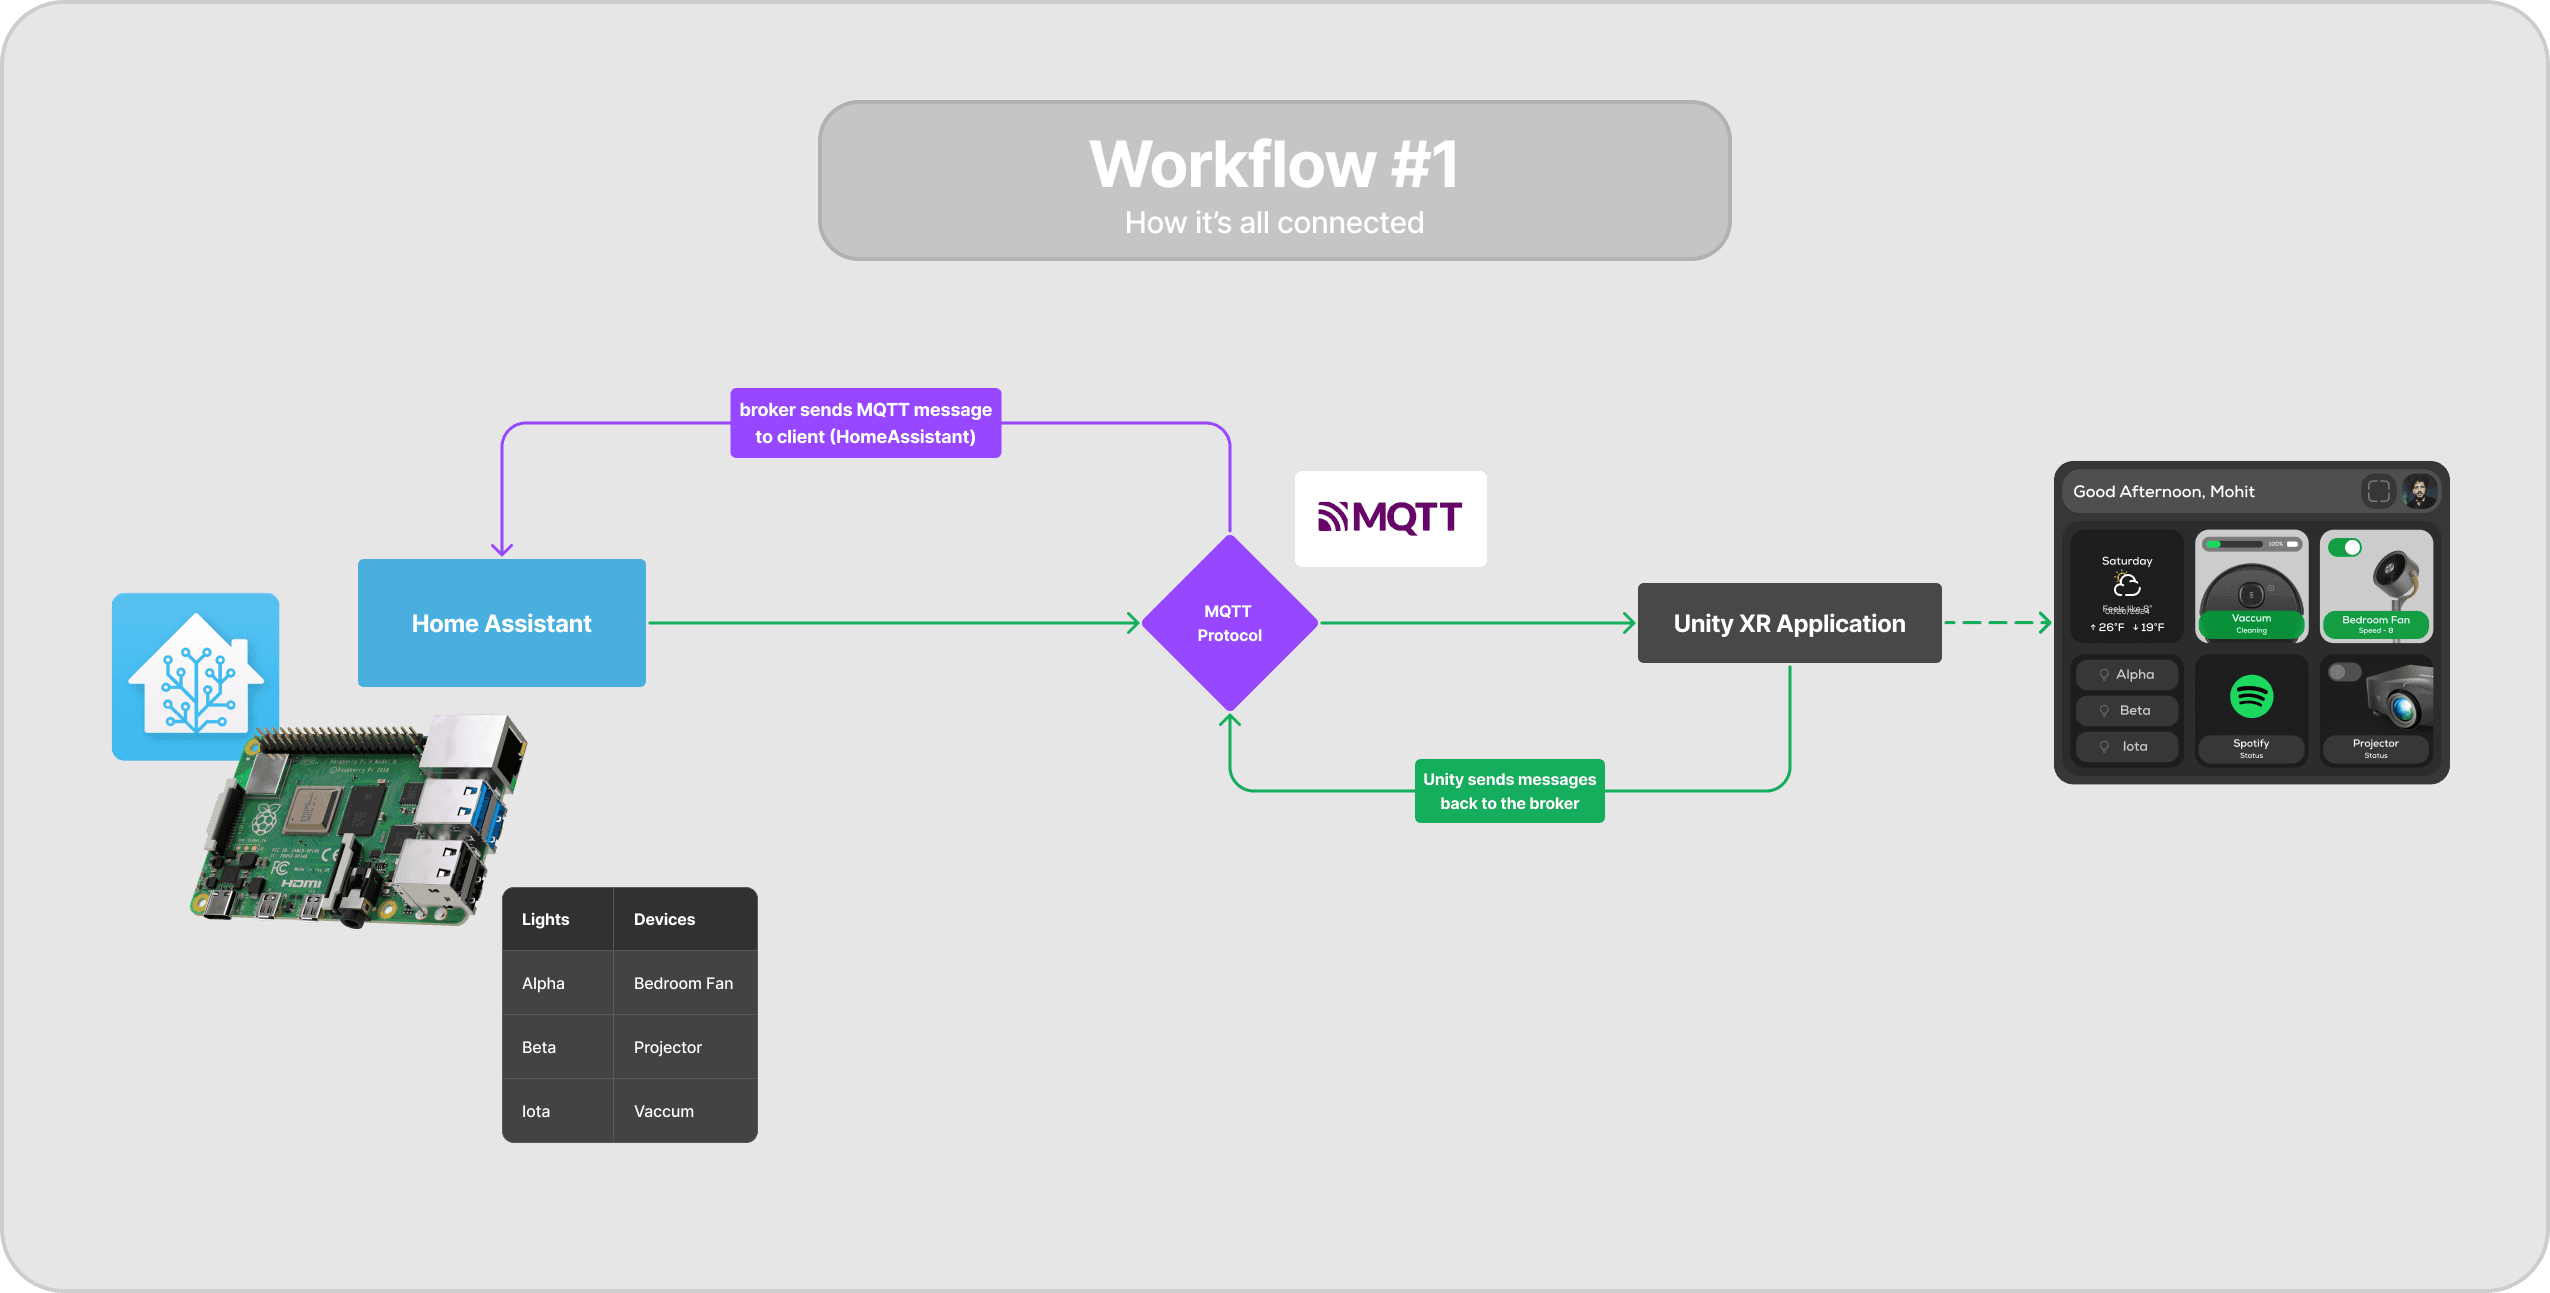
How it works
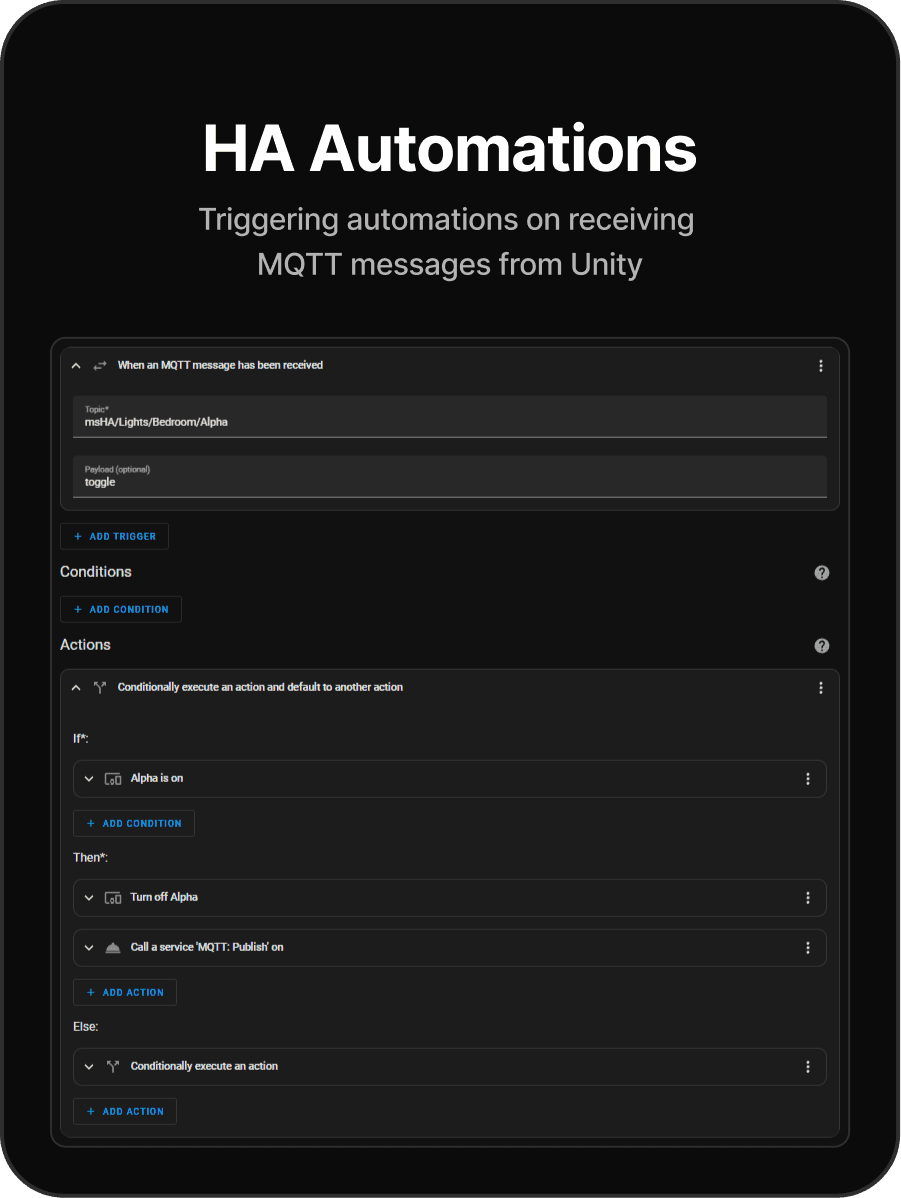
The diagrams below illustrate how the application communicates with the physical devices. Essentially a custom open source smart home OS (called home assistant) was installed on a raspberry pi and it communicates over local WiFi network with the smart home devices.
Messages are passed back and forth using the MQTT protocol, which is a widely adopted & low latency method of communicating with iOT devices.
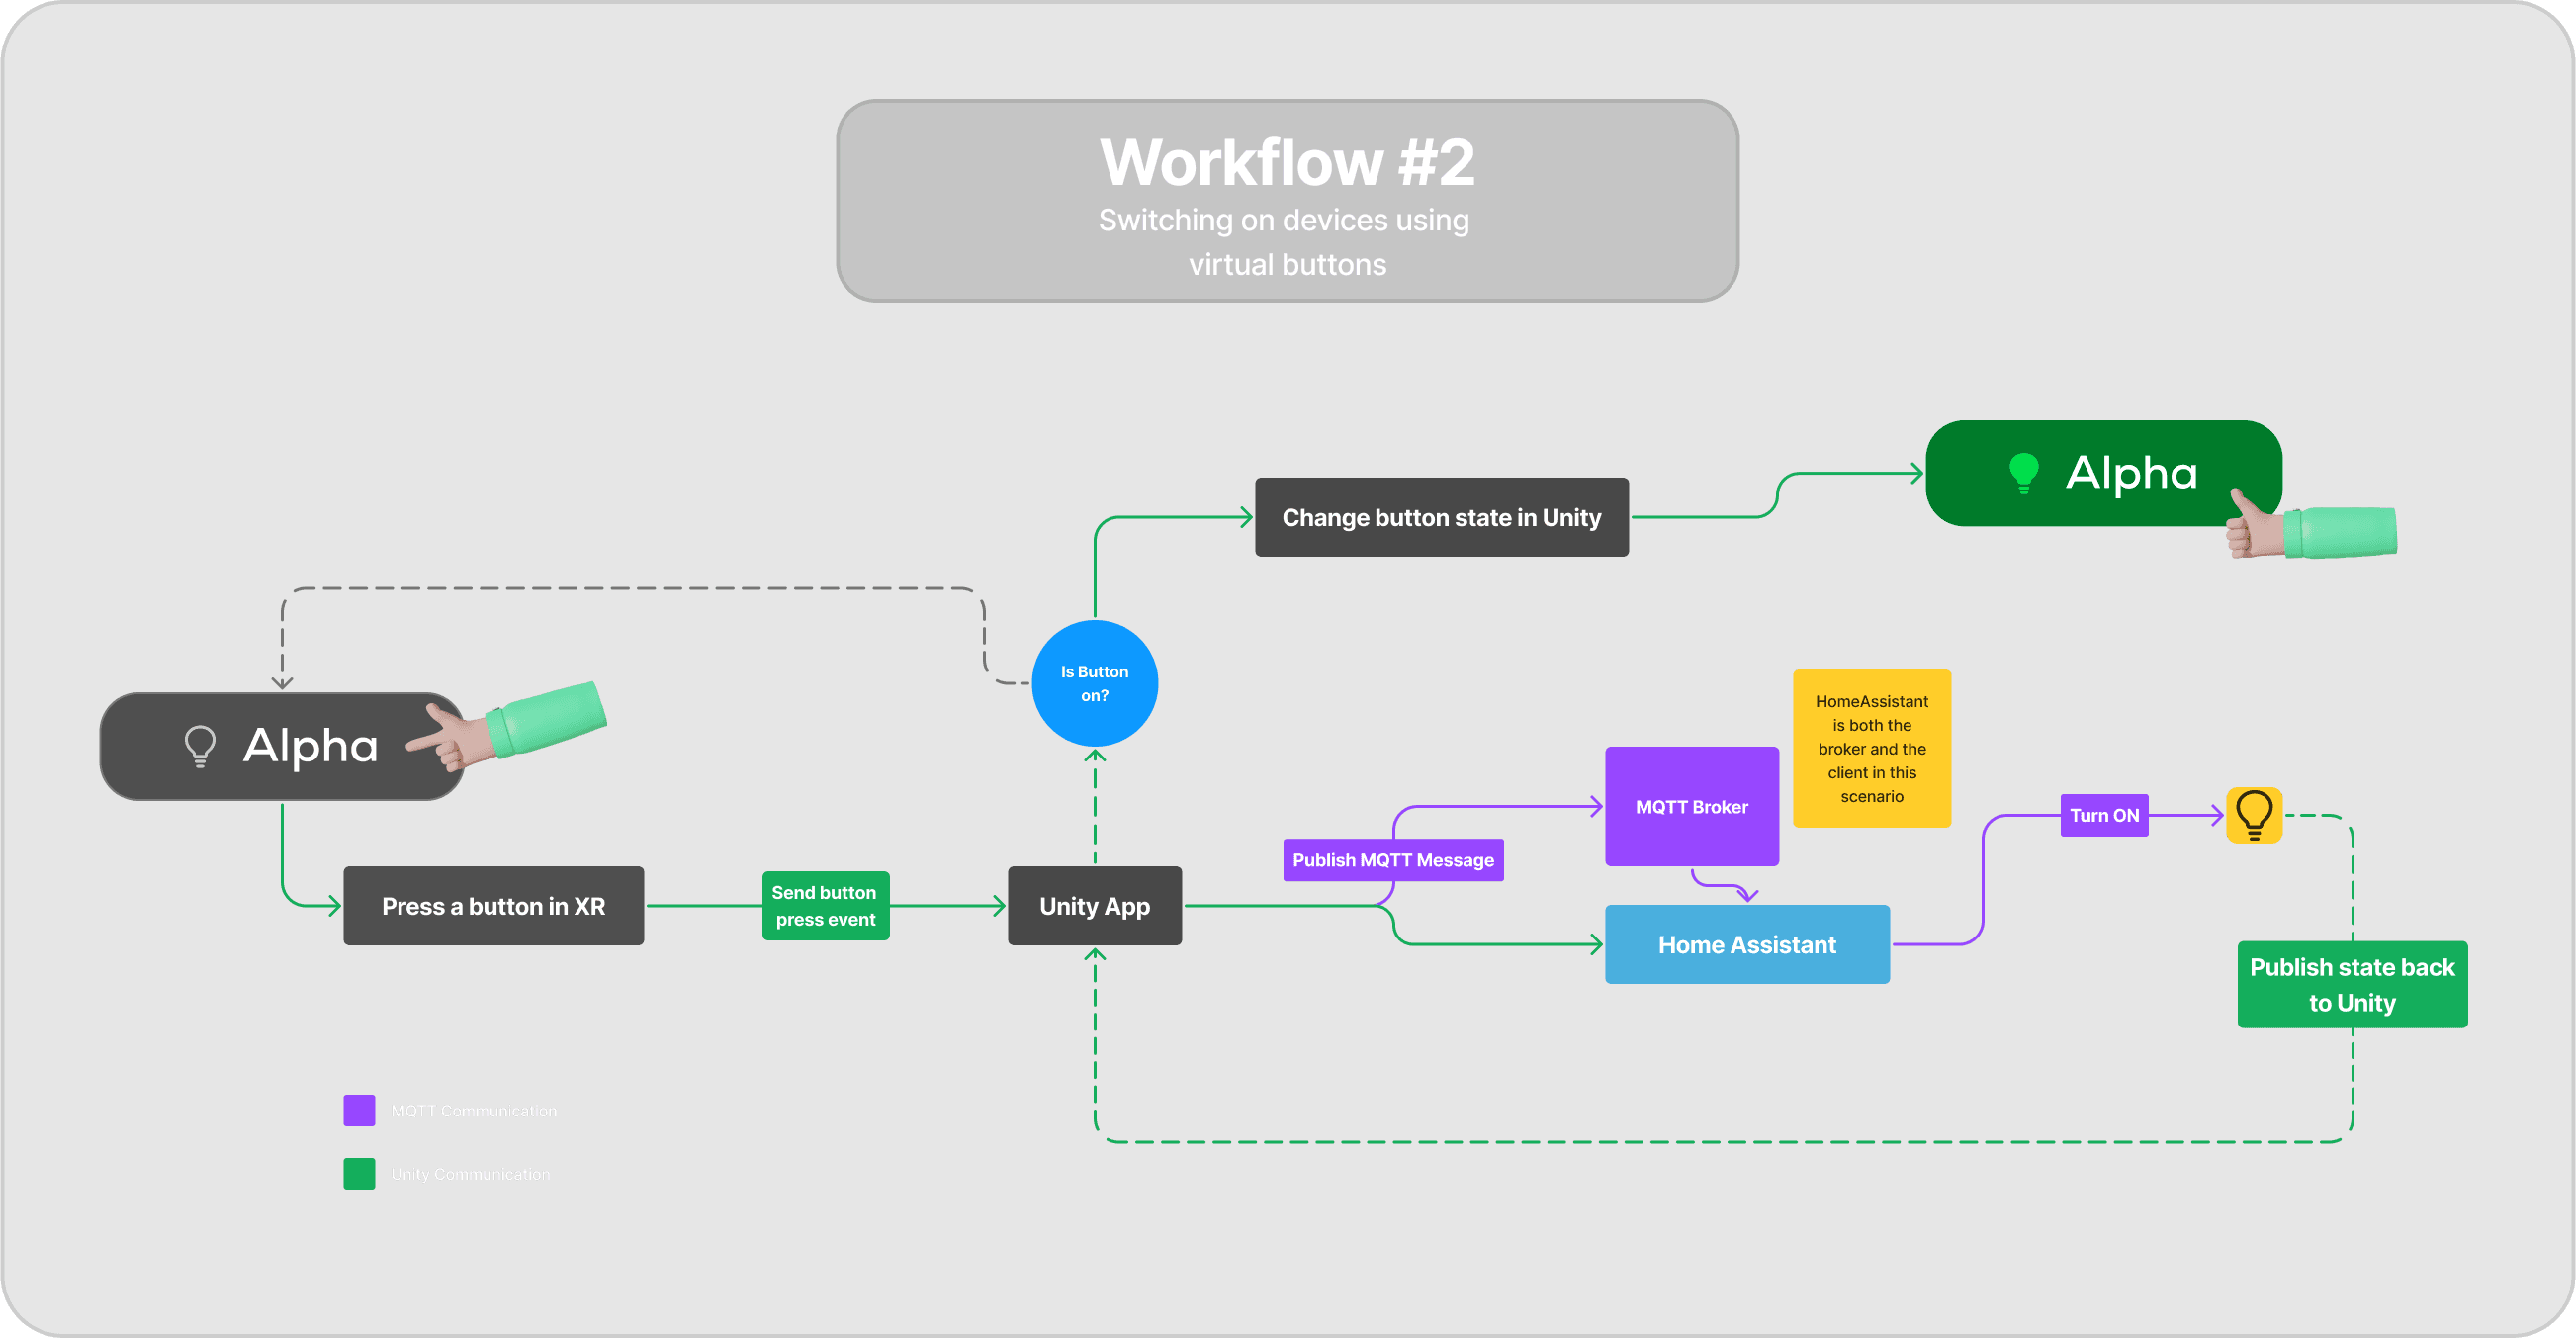
When a button is turned on, the message transfer protocol (MQTT) is used to communicate with Home Assistant to toggle 'Alpha', as shown in the image.
These automations were created for various devices in the dashboard. For some I had to call the Google Home APK service with custom commands, as the entity definitions didn't have the right functionalities to control via HA directly.